How To Install Adobe Bridge CC
Learn how to install Adobe Bridge CC, a powerful file browser and companion program for Photoshop. Bridge CC is included as part of your Creative Cloud subscription. To install Bridge, we'll use the Creative Cloud desktop app. This tutorial is specifically for Photoshop CC users.
In this series of tutorials, we're learning how to get started with Adobe Photoshop. Part of getting started with Photoshop means installing Adobe Bridge, a separate application that's included with your Creative Cloud subscription. Bridge is a file browser that lets us find, organize, select and open our images. Your computer's operating system also has a built-in file browser (File Explorer in Windows or Finder on a Mac). But Adobe Bridge is much more powerful and easier to use. And Bridge has lots of great features that your operating system's file browser doesn't have.
In the next tutorials in this series, we'll learn more about Adobe Bridge and why we want to use it. First, we'll learn how to use Bridge to download photos from your camera to your computer. Then, we'll look at the many features of Bridge that make finding, organizing, previewing and selecting images both easy and intuitive. And, as we'll learn in the next series of tutorials, Adobe Bridge is also the best way to open images directly into Photoshop's powerful image editing plugin, Camera Raw.
But before we can learn how to use Adobe Bridge, we first need to install it. This tutorial on installing Bridge is specifically for Photoshop CC users. That's because Adobe Bridge CC (the version of Bridge included with your Creative Cloud subscription) needs to be installed separately. We'll learn how to install it in this tutorial using the Creative Cloud desktop app. With Photoshop CS6 and earlier, Bridge installs automatically with Photoshop, so there's no need to install it ourselves. If you're using Photoshop CS6 or earlier, you can skip ahead to the next tutorial in this series, How To Download Photos From Your Camera With Bridge.
This is lesson 2 of 8 in Chapter 1 - Started with Photoshop.
Installing Adobe Bridge CC
Step 1: Open The Creative Cloud Desktop App
To install Adobe Bridge CC, we use the Creative Cloud desktop app. If you've already downloaded and installed Photoshop CC, you'll have the Creative Cloud app on your computer. It should be running in the background. We can open the app by clicking on its icon. On a Windows PC, you'll find the Creative Cloud icon in the notification area on the right of your taskbar along the bottom of the screen:
On a Mac, the Creative Cloud icon is located on the right of the menu bar along the top of the screen:
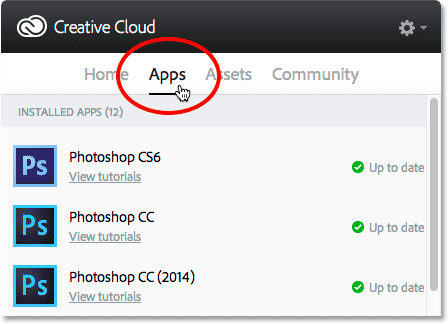
Step 2: Switch To The Apps Section
Clicking the icon opens the Creative Cloud desktop app. Select the Apps category from the menu along the top:

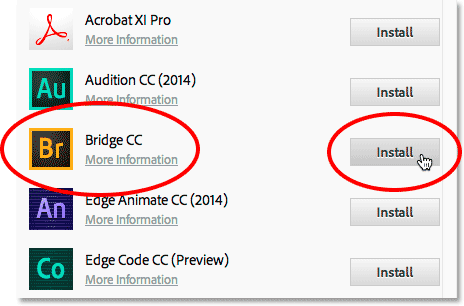
Step 3: Scroll Down To Bridge CC And Click "Install"
This opens a list of Creative Cloud apps already installed on your computer, as well as apps that are not yet installed but are available to download. The apps you see in your list will depend on your Creative Cloud subscription plan, but Adobe Bridge is included with every subscription. Scroll down through the list until you find Bridge CC. Then, click the Install button:

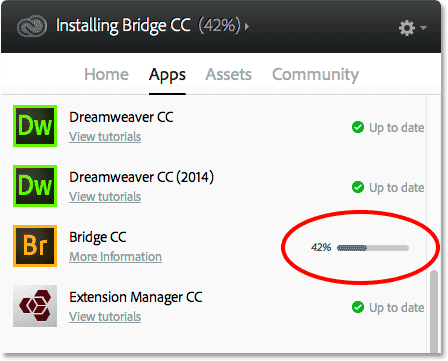
Bridge CC will immediately begin downloading and installing. A progress bar lets you know how it's going:

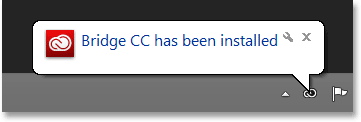
When Bridge has finished installing, a message will pop up telling you that Bridge CC has been installed. To close the Creative Cloud app, click anywhere outside of it on your screen to collapse it back into its icon:

Where to go next...
And there we have it! We've installed Adobe Bridge CC and we're ready to go. In the next lesson, we'll learn how to use Bridge to download photos from your camera to your computer!