
Navigating Images With Birds Eye View In Photoshop
Learn how to use Birds Eye View in Photoshop to easily navigate around your image while you're zoomed in, including the secret trick you need to know to access this amazing but hidden feature. Part 5 of our chapter on Navigating Images in Photoshop. For Photoshop CC ad CS6.
Photoshop has a hidden feature that makes it incredibly easy to navigate from one part of an image to another when you're zoomed in. It's called the Birds Eye View. When you're zoomed in close to your subject, the Birds Eye View instantly zooms you out to fit your entire image on the screen, giving you a "birds eye view" of where you are. You can then zoom back in to the same spot, or choose a completely different part of the image to zoom in. In other words, Birds Eye View lets us easily jump from one part of the image to another without needing to manually zoom in and out!
You won't find a Birds Eye View tool or option anywhere in Photoshop. To use Birds Eye View, you need to know the secret trick. I briefly covered Birds Eye View in a previous lesson where we learned the basics of zooming and panning images in Photoshop. But because it's such a useful feature, it really deserves it's own tutorial. I'll be using Photoshop CC but everything we'll be learning here is fully compatible with Photoshop CS6.
This is lesson 5 of 7 in Chapter 4 - Navigating Images in Photoshop. Let's get started!
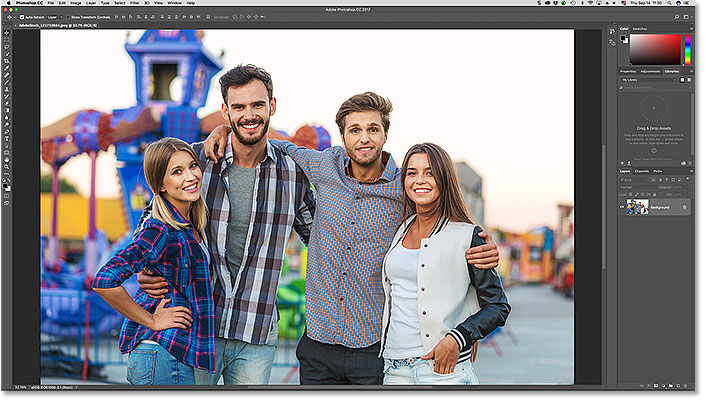
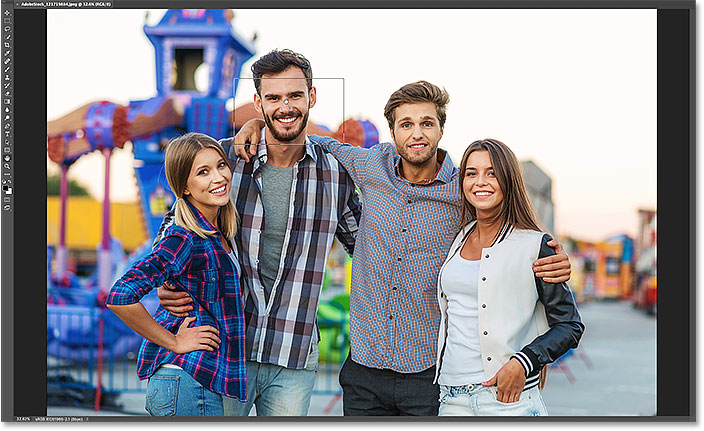
Here's the image I've opened in Photoshop (group photo from Adobe Stock):
Zooming In For A Closer Look
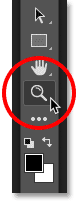
To use Birds Eye View, we first need to be zoomed in on the image. To zoom in, we use the Zoom Tool. I'll select the Zoom Tool from the Toolbar:
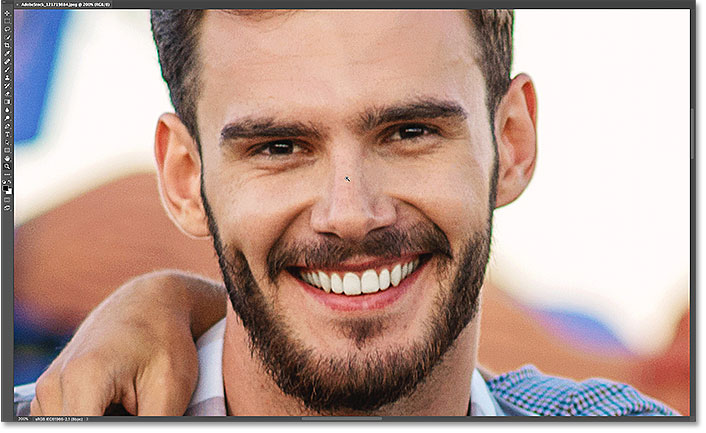
Then, to zoom in, click on a spot within the image for a closer look. Each time you click with the Zoom Tool, you'll zoom in closer. I'll zoom in on the face of the man on the left, and here we see that his face is now front and center in the document window:
How To Use The Birds Eye View
What if I want to stay at my current zoom level, but switch to a different person in the photo? Most people would scroll, or pan, the image using Photoshop's Hand Tool, and there's nothing wrong with that. But there's a better, faster way to do it, and that's by using the Birds Eye View.
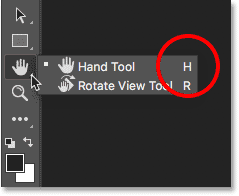
Knowing The Keyboard Shortcut For The Hand Tool
Even though you don't need to select the Hand Tool to use the Birds Eye View, you do need to know its keyboard shortcut. To find the keyboard shortcut, click and hold on the Hand Tool's icon in the Toolbar. The Hand Tool is directly above the Zoom Tool. By clicking and holding on the tool, you'll open a fly-out menu. Notice that the Hand Tool has a keyboard shortcut of H:
You can use Birds Eye View no matter which tool is currently active. To use Birds Eye View, press and hold the Hand Tool's shortcut (H) on your keyboard. Even if you already have the Hand Tool selected, you still need to press and hold "H". Then, with the "H" key held down, click and hold on your image. Photoshop instantly zooms the image out so that it fits entirely on the screen, giving you a birds eye view of where you are. You can release the "H" key once your mouse button is held down:
The Birds Eye View Rectangle
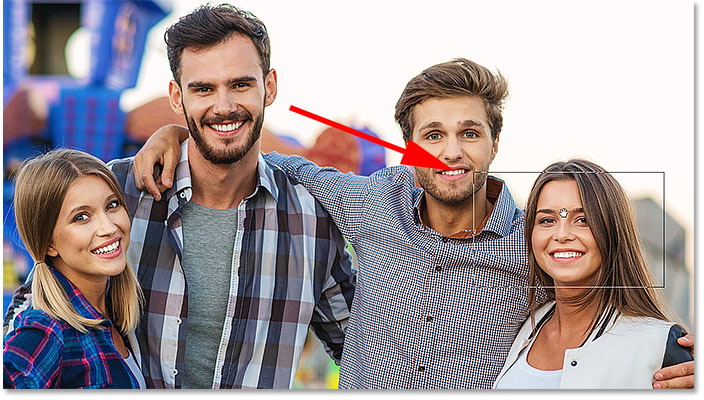
Notice the rectangular outline that appears around the Hand Tool's cursor while in Birds Eye View. The rectangle represents your document window. It surrounds the section of the image that fits within your document window at your current zoom level (that is, the zoom level you were at just before switching to the Birds Eye View). With my image, the rectangle is appearing around the man's face. That's the area I was zoomed into a moment ago:

Choosing A Different Area To Zoom In
To zoom in on a different part of your image, keep your mouse button held down and drag the rectangle over to the new area where you want to zoom in. In my case, I'll drag the rectangle over the woman's face on the far right:
Zooming In On The New Area
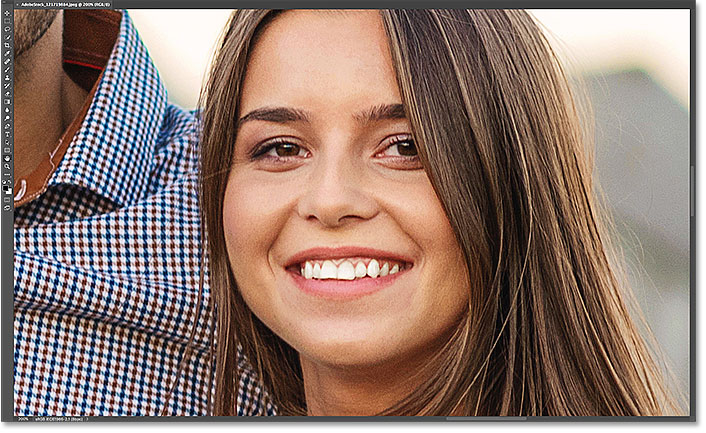
To zoom in on the new area from the Birds Eye View, simply release your mouse button. When you do, Photoshop instantly returns the image to the same zoom level you were using before switching to Birds Eye View. And, the new area you surrounded with the rectangle appears zoomed in and centered on your screen. In my case, we see that Photoshop has now zoomed in on the woman’s face. To navigate to a different area, once again press and hold “H” on your keyboard, and then press and hold your mouse button to switch to Birds Eye View. Drag the rectangle to a new location, then release your mouse button:
Where to go next...
And there we have it! In the next lesson in this series, we'll learn how to use the Rotate View Tool in Photoshop to easily rotate the view of our image as we work!