
Easy Soft Focus And Glow Effect In Photoshop
In this Photoshop tutorial, we'll look at how to quickly and easily add a soft focus and glow effect to a photo, which also happens to do a nice job of boosting the image's contrast and color saturation. I've been using this technique with my photos for years and it's still just as popular today. Whether you're a wedding photographer, nature photographer or you simply enjoy taking photos of family and friends, give this effect a try and see if it doesn't make your images look a bit more magical.
Here's the photo I'll be working with in this tutorial:

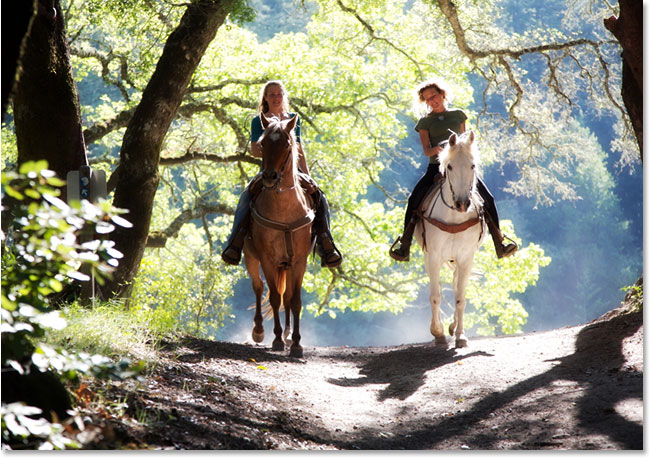
And here's how it will look after adding our soft glow:

Step 1: Duplicate The Background Layer
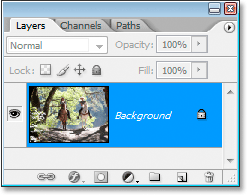
With our image newly opened in Photoshop, we can see if we look in our Layers palette that we currently have one layer which is the Background layer. The Background layer is the layer that contains our original image:
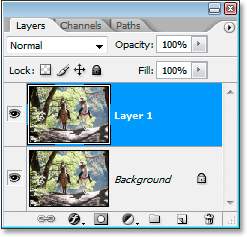
We need to duplicate this layer, and the easiest way to do that is by using the keyboard shortcut Ctrl+J (Win) / Command+J (Mac). If we look again in our Layers palette, we can see that we now have two layers - the Background layer on the bottom and a copy of the Background layer, which Photoshop has automatically named "Layer 1", above it:
Step 2: Change The Blend Mode Of "Layer 1" To "Overlay"
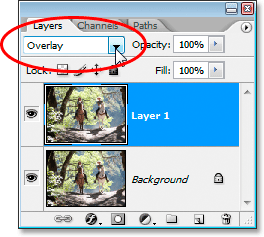
With "Layer 1" selected in the Layers palette (the currently selected layer is highlighted in blue), go up to the Blend Mode option in the top left corner of the Layers palette. It's the drop-down box that's currently set to "Normal". Click on the down-pointing arrow and select the Overlay blend mode from the list:
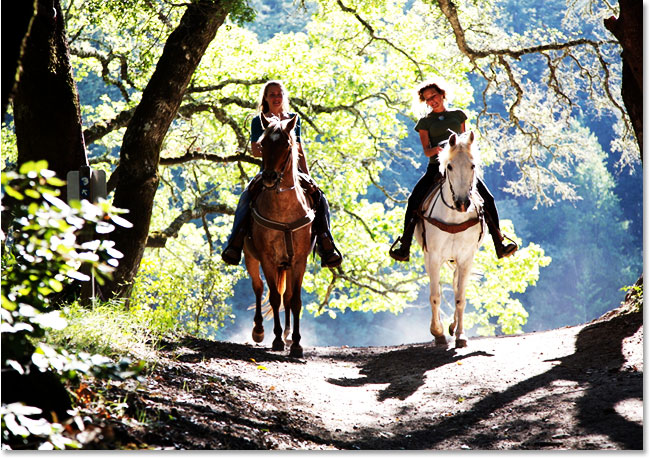
If you recall from our Five Essential Blend Modes For Photo Editing tutorial, the Overlay blend mode is part of the Contrast group of blend modes because it boosts image contrast, and it also tends to boost color saturation as well. If we look at our image now after changing the blend mode to Overlay, we can see that sure enough, the contrast and color saturation have both been increased dramatically:
Step 3: Apply The "Gaussian Blur" Filter
Believe it or not, we're almost done! We can now add our soft focus / glow effect to the photo. With "Layer 1" still selected, go up to the Filter menu at the top of the screen, choose Blur, and then choose Gaussian Blur. This brings up Photoshop's Gaussian Blur dialog box.
At the bottom of the dialog box, you'll see a slider bar which controls the Radius value. The higher you set the Radius value, the more blurring you'll apply to the layer. Drag the slider towards the right until the Radius value is somewhere around 8 pixels. You may want to set the value a bit higher if you're using a high resolution image. The best thing to do is to keep an eye on your image in the document window as your drag the slider to see what effect it's having. Make sure you have the Preview option checked in the top right corner of the dialog box. If you set the Radius value too high, the soft focus effect will be too subtle, so try to stick with lower Radius values:
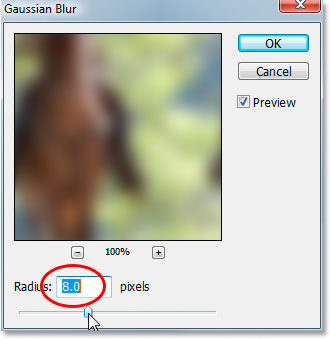
When you're happy with the effect, click OK to exit out of the dialog box, and you're done! Here's my photo after applying the Gaussian Blur:
Step 4: Lower The Opacity Of "Layer 1" (Optional)
If you find that the effect appears too strong, try lowering the Opacity of "Layer 1". You'll find the Opacity option in the top right corner of the Layers palette directly across from the Blend Mode option. Here I'm lowering the opacity to around 60%:
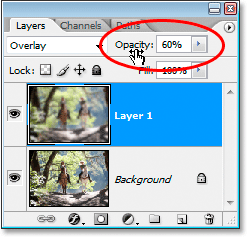
The soft focus effect now appears less intense:
Step 5: Change The Blend Mode To "Soft Light" (Optional)
Another easy way to reduce the intensity of the effect is to change the blend mode of "Layer 1" from "Overlay" to Soft Light:
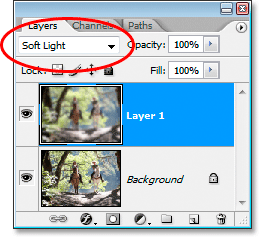
The Soft Light blend mode is also part of the Contrast group of blend modes, but its effect is much more subtle than what the Overlay blend mode gives us:

And there we have it! That's how easy it is to add a soft focus and glow effect to an image with Photoshop! Visit our Photo Effects section for more Photoshop effects tutorials!