
Make Photoshop Your Default Image Editor In Mac OS X
Learn how to make Adobe Photoshop your default image viewer and editor for popular file formats like JPEG, PNG and TIFF, as well as Photoshop's own PSD format, in Mac OS X.
Even though every copy of Photoshop, whether it's a standalone version or part of a Creative Cloud subscription, includes a free and powerful file management program called Adobe Bridge, many Mac users still prefer the Finder for locating and opening their images.
While there's nothing technically wrong with that, there is one annoying problem; Mac OS X, at least by default, ignores Photoshop when we open images directly from within a Finder window. Instead, it prefers to open them in Apple's own Preview app with its basic and very limited set of image editing features. Since Photoshop is obviously our editor of choice, let's learn how to easily configure Mac OS X so that our images will automatically open for us in Photoshop every time.
Note that this tutorial is specifically for Mac users. For the PC version, see Make Photoshop Your Default Image Editor in Windows 10.
This is lesson 2 of 10 in Chapter 2 - Opening Images into Photoshop.
Turning On File Name Extensions
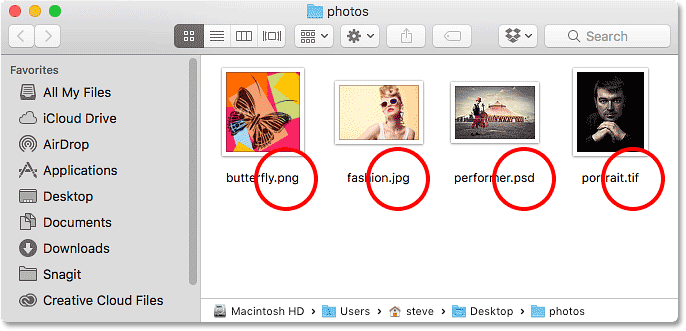
First, navigate to a folder on your Mac that contains one or more images. Here, I've opened a folder that's sitting on my Desktop. Inside the folder are four image files. Starting from the left, we have a PNG file, a JPEG file, a Photoshop PSD file, and a TIFF file. How do we know which file type we're looking at? We know because of the three letter extension at the end of each name:
If you're not seeing the extensions at the end of your file names, go up to the Finder menu in the top left of your screen and choose Preferences:

This opens the Finder Preferences dialog box. Click the Advanced tab at the top, then select Show all filename extensions by clicking inside its checkbox. Close the dialog box when you're done. You should now see the file extensions listed at the end of your file names:

The Default Image Viewer
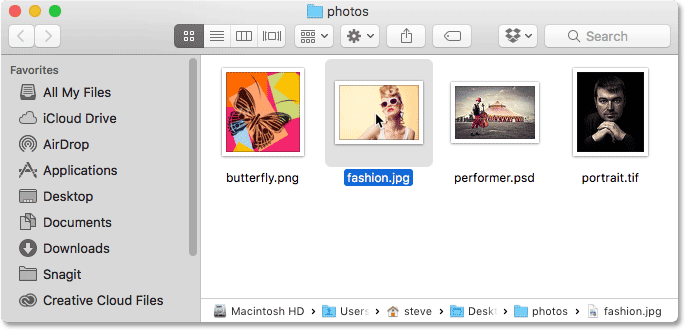
Let's try opening one of the images to see what happens. I'll double-click on my JPEG image ("fashion.jpg") to open it:
Even though I have the latest version of Photoshop installed, and even though Photoshop just happens to be the world's most powerful image editor, Mac OS X completely ignores it and instead opens my photo in its own Preview app (fashion photo from Adobe Stock):

That's obviously not what I wanted so I'll close out of the Preview app by going up to the Preview menu at the top of the screen and choosing Quit Preview:

Making Photoshop The Default Image Viewer And Editor
So how do we tell Mac OS X to open this image in Photoshop instead of in Preview? And more importantly, how to we tell it to use Photoshop not just for this one image this one time but for every JPEG image we open in the future? It's actually very easy to do. First, Control-click on a JPEG image you want to open:
Then choose Get Info from the menu that appears:

A long, narrow Info dialog box will open full of details about the image. Look for the section that says Open with. You may need to click the small arrow to the left of the section's name to twirl it open. This section tells us which program Mac OS X is currently using to open JPEG files. By default, it's set to Preview:

Click on "Preview.app" to open a list of other apps currently installed on your system and choose Adobe Photoshop from the list. If you have more than one version of Photoshop installed, choose the most recent version. Again, at the time I'm writing this, the most recent version is CC 2015.5:

There's just one step remaining. To set Photoshop as the new default app for opening all JPEG files, not just this one, click the Change All button:

You'll be asked if you're sure you want to open all JPEG files (that is, all files with a ".jpg" extension) with Photoshop. Click Continue to confirm it:

You can close out of the Info dialog box at this point, and that's all there is to it! Photoshop is now set to open all of your JPEG files. I'll double-click once again on my JPEG image in the Finder window:
And sure enough, instead of opening in the Preview app as it did before, this time the photo opens for me in my latest version of Photoshop:

PNG Files
So far, so good. We've set Photoshop as the default app for opening JPEG files. But we still need to set Photoshop as the default app for opening the other file types as well, so let's run through the steps quickly. I'll return to my Finder window, then I'll Control-click on my PNG file ("butterfly.png") and choose Get Info from the menu:

This opens the Info dialog box where we see that Preview, not Photoshop, is currently set as the default app for opening PNG files:

I'll click on "Preview.app" and select my latest version of Photoshop from the list. Then, to set Photoshop as the default app for all PNG files, I'll click Change All:

I'll confirm that I want all PNG files to open in Photoshop by clicking Continue:

Then I'll close out of the Info dialog box. And now, when I open my PNG file from my Finder window by double-clicking on its thumbnail, the image opens in Photoshop, as will all PNG files from now on (butterfly design from Adobe Stock):

TIFF Files
Let's do the same thing for TIFF files. I'll return once again to my Finder window where I'll Control-click on my TIFF image ("portrait.tif"). Then, I'll choose Get Info from the menu:

In the Info dialog box, we see that just like with the JPEG and PNG files, Mac OS X is using Preview to open TIFF files. It's possible that your system may have a different app selected so don't worry if it does. All that matters is that we change it to Photoshop:

I'll once again click on "Preview.app" and select my latest version of Photoshop from the list. Then I'll make the change apply to all TIFF files by clicking Change All:
I'll click Continue to confirm the change:

Then I'll close out of the Info dialog box. And now when I double-click on my TIFF file to open it in the Finder window, we see that it opens automatically in Photoshop (portrait photo from Adobe Stock):

PSD Files
Finally, while Mac OS X will usually set Photoshop as the default app for opening PSD files (since PSD is Photoshop’s native file format), it still never hurts to check. Plus, if you have multiple versions of Photoshop installed on your computer, it’s worth making sure that your PSD files will open in the newest version, as we're about to see.
I'll return one last time to my Finder window where I'll Control-click on my PSD file ("performer.psd") and choose Get Info:

In the Info dialog box, we see that sure enough, Mac OS X is using Photoshop to open PSD files. But, there's a problem. I still have older versions of Photoshop installed on my system, and Mac OS X has chosen one of the older versions, not the newest version. Here we see that it's set to use Photoshop CC 2014, while the newest version (at the time I'm writing this) is CC 2015.5:

I'll click on "Adobe Photoshop CC 2014.app" and choose the latest version of Photoshop from the list:

Then, as I've done with the other file types, I'll make the change apply to all PSD files by clicking Change All:
I'll click Continue to confirm the change:

Then I'll close out of the Info dialog box. And now when I double-click on my PSD file in the Finder window, it opens automatically in my latest version of Photoshop (performer photo from Adobe Stock):

Where to go next...
And there we have it! That's how to make Photoshop your default image editor in Mac OS X! If you're also a Windows user, learn how to make Photoshop your default image editor in Windows 10.
In the next lesson in this series, we'll learn how to create a new documentin Photoshop using the redesigned New Document dialog box!