
Camera Raw 8 – The Straighten Tool / Crop Tool Combo
Written by Steve Patterson. In previous tutorials, we learned the basics of using the Crop Tool in Adobe Camera Raw to crop our images non-destructively, and we learned how the Crop Tool, along with its Show Overlay option, can be used to rotate and straighten images.
In this tutorial, we'll learn how to straighten photos using the combined power of Camera Raw's Straighten Tool and the Crop Tool, both designed to work seemlessly together to straighten and crop our photos at the same time.
Again, just a quick reminder that these tutorials in our Adobe Camera Raw series are for Camera Raw 8, part of Photoshop CC (Creative Cloud) and available as a free update for Photoshop CS6 users. To get the most from this lesson, I recommend first reading through our main Crop Tool tutorial as well as our Rotating And Straightening Images tutorial. For other tutorials in this series, check out our complete Photo Retouching section.
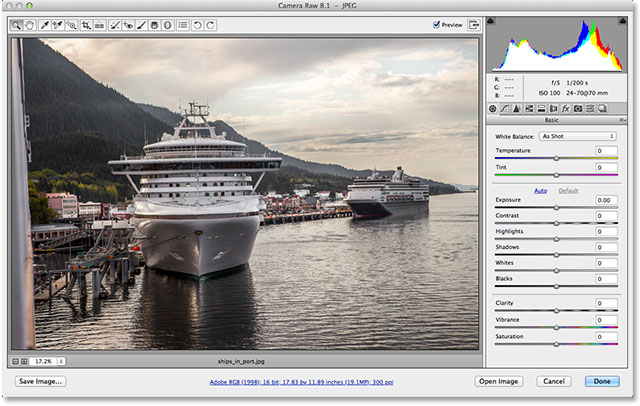
Here's a photo I shot of a couple of cruise ships arriving at port early one morning. I was standing on the deck of a third ship when I took the photo, and like I said, it was early morning, things were still a bit fuzzy, and I obviously wasn't holding the camera quite as level as I thought I was:
Let's see how I can quickly straighten the image using the Straighten Tool. You'll find the Straighten Tool in the toolbar along the top left of the Camera Raw dialog box (directly to the right of the Crop Tool). Unlike the Crop Tool, the Straighten Tool doesn't have any hidden menu options so to select it, simply click on its icon. Or, you can select the Straighten Tool by pressing the letter A on your keyboard:

With the Straighten Tool selected, look for something in your image that should be straight, either horizontally or vertically. Then, simply click on one end of it, keep your mouse button held down, drag over to the other end, then release your mouse. In my case here, I'll use the large observation deck on the ship on the left since it should appear horizontally straight in the photo. To make it easier to see, I'll temporarily access Camera Raw's Zoom Tool by pressing and holding Ctrl+Spacebar (Win) / Command+Spacebar (Mac) on my keyboard. This changes my mouse cursor to a magnifying glass with a plus sign in the middle. I'll click a couple of times on the area where I want to zoom in:

Now that I'm zoomed in, I'll release Ctrl+Spacebar (Win) / Command+Spacebar (Mac) to revert back to the Straighten Tool. Next, I'll click somewhere on the left side of the observation deck to set my starting point, and with my mouse button held down, I'll drag across it to the right side. As you drag, you'll see a dashed line appearing so you can make sure you're lining things up correctly:

Quick Tip: The Straighten Tool's default mouse cursor makes it hard to tell exactly where you're clicking. Pressing the Caps Lock key on your keyboard will change the cursor to a crosshair so you can more easily line up your click spot with the center of the crosshair. Just make sure to turn Caps Lock off when you're done, otherwise you may forget it's on and wonder why other things are suddenly not working properly.
Release your mouse button when you're done and watch what happens. Camera Raw instantly switches from the Straighten Tool to the Crop Tool (if you look up in the toolbar, you'll see that the Crop Tool is now selected) and it automatically draws a crop box around the image. The crop box is rotated to the same angle you dragged with the Straighten Tool. If you zoomed in on your image as I did, you'll most likely need to zoom back out to see the entire crop box. To instantly jump to the Fit on Screen view mode, press Ctrl+0 (Win) / Command+0 (Mac) on your keyboard:

Press Enter (Win) / Return (Mac) on your keyboard and the image is instantly straightened. You'll probably notice that a bit of the image around the edges had to be cropped away in the process, but the image itself should now appear straight:

If you find that the angle at which you dragged with the Straighten Tool wasn't quite right and your image still isn't straight, or you want to change the crop, here's a trick. Rather than reselecting the Straighten Tool, simply press the letter C on your keyboard to select the Crop Tool. Since everything we do in Camera Raw is non-destructive, your cropping border will reappear just as it was a moment ago, rotated to the same angle:

Any time the Crop Tool is active, you can temporarily switch to the Straighten Tool simply by pressing and holding the Ctrl (Win) / Command (Mac) key on your keyboard. You can then re-drag across the same part of the image or try a different area that should appear straight. This time I'll drag from bottom to top through the vertical center of the ship:

When you release your mouse button, Camera Raw re-adjusts the rotation angle of the crop box. You can then release your Ctrl (Win) / Command (Mac) key to revert from the Straighten Tool back to the Crop Tool:

If you also want to adjust the crop box itself, you can click and drag any of the handles around the box to resize it. If you have your Crop Tool set to a preset aspect ratio from the Crop Tool's menu, like 2 to 3 or 4 to 5, you'll find a resizing handle in each of the four corners. If you're cropping in Normal mode as I am here, you'll find additional handles on the top, bottom, left and right (see the main Crop Tool tutorial for more details on cropping to specific aspect ratios). To move and reposition the crop box inside the image, click anywhere inside the box, hold your mouse button down, then drag with your mouse:

When you're done, press Enter (Win) / Return (Mac) on your keyboard and Camera Raw crops and straightens the image at the same time:

And there we have it! That's how to crop and straighten an image using the combined powers of the Straighten Tool and the Crop Tool in Adobe Camera Raw 8! Check out our Photo Retouching section for more Photoshop image editing tutorials!