
Resizing Images For Email And The Web With Photoshop CC
In the first tutorial in this series on resizing images in Photoshop CC (Creative Cloud), we learned about the new features and improvements in the redesigned Image Size dialog box. We then looked at the basics of how to resize images where we learned how to change the print size of a photo. In this third tutorial, we'll look specifically at one of the most common uses for Photoshop these days - how to resize an image so it's suitable for sending off in an email or uploading to a website. To get the most from this tutorial, I recommend first reading through the previous two in this series, as well as our related article on The 72 PPI Web Resolution Myth which explains, in more detail than I'll get into here, why we don't need to worry about the Resolution value in the Image Size dialog box when resizing images for the web or any type of screen output.
Here's a photo I currently have open in Photoshop CC (tourists with Eiffel Tower photo from Shutterstock):
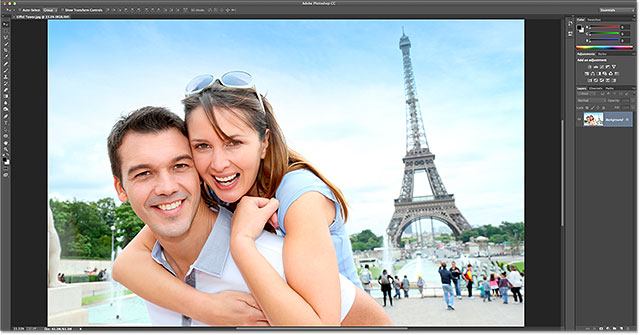
Whenever we're resizing an image either for emailing to someone or uploading to a website, there's two things we need to be concerned with. The first is making sure the pixel dimensions (that is, the actual number of pixels in the image from top to bottom and from left to right) are small enough for the photo to fit easily on a typical computer display. In other words, we don't want people to have to zoom out to see the entire image on their screen. Second, we want the file size (in megabytes) to be small enough so that the image won't clog up the recipient's mail server or take too long to download and display in a web browser. Fortunately, as we'll see, taking care of the first problem (reducing the pixel dimensions) usually takes care of the second problem for us at the same time.
Duplicate The Image Before Resizing
Before we go changing the pixel dimensions of an image, it's always a good idea to duplicate the image first and then do all of our resizing work on the duplicate. That away, we remove any risk of making permanent changes to the original. To duplicate the image, go up to the Image menu in the Menu Bar along the top of the screen and choose the Duplicate command:
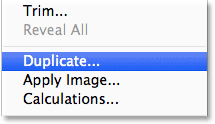
Photoshop will pop open the Duplicate Image dialog box. You can name the duplicate anything you like (or just accept the default name) because you can easily change the name later when you go to save the image. If your original document contains multiple layers, select the Duplicate Merged Layers Only option in the bottom left of the dialog box to have Photoshop flatten the duplicate image for you:

Click OK to close out of the dialog box, at which point Photoshop creates the duplicate version of the image and opens it in a separate tabbed document. The currently open and active document appears with its name highlighted in the tab:

The Image Size Dialog Box
Now that we have our duplicate version, we can safely resize it. To resize images, we use Photoshop's Image Size command which we access by going up to the Image menu and choosing Image Size:
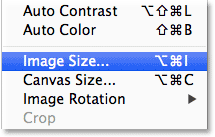
This opens Photoshop CC's redesigned Image Size dialog box, complete with a new preview window on the left:
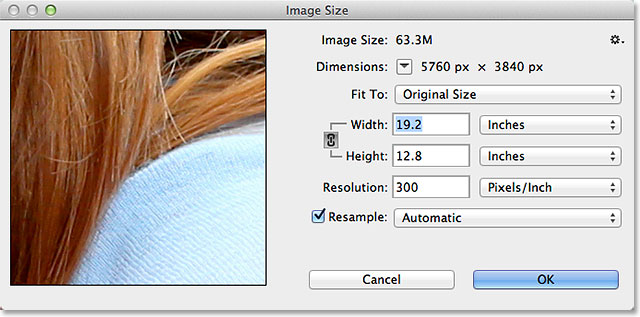
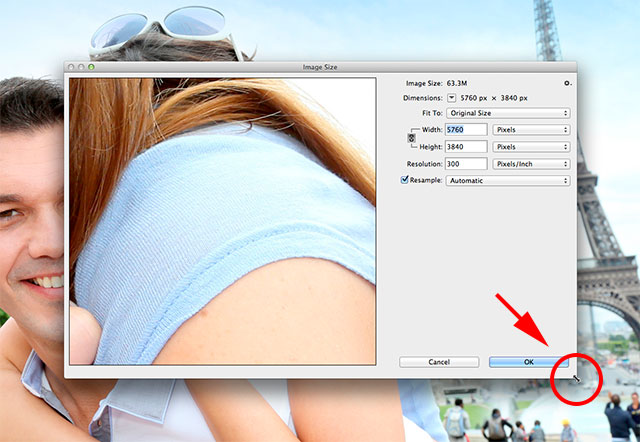
You can expand the size of the preview window by resizing the dialog box itself. Simply click on any of the corners of the dialog box and, with your mouse button held down, drag the corner outward. The larger the dialog box, the larger the preview window. Here, I'm clicking and dragging the bottom right corner, giving me more room to view the image in the preview window:
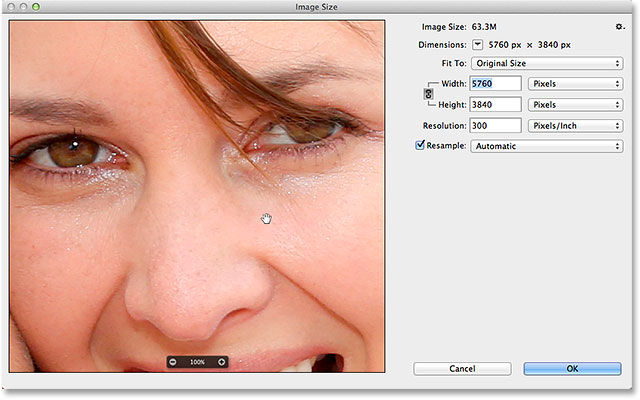
To move the image around inside the preview window, click anywhere in the preview window and, with your mouse button held down, drag the image to reposition it:
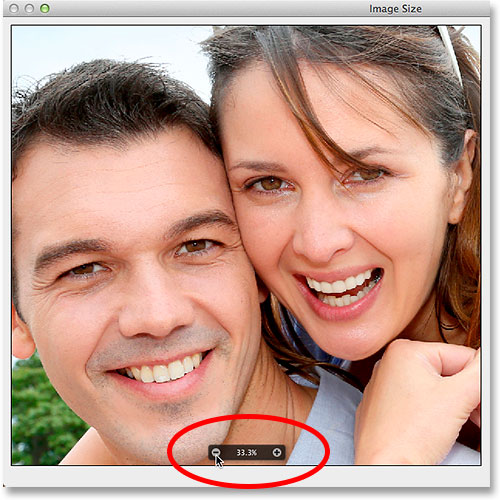
You can also zoom in or out of the image from within the preview window by clicking either the plus icon ( + ) to zoom in, or the minus icon ( - ) to zoom out, in the small bar that appears along the bottom of the window when you hover your mouse over it. Here I've zoomed out to fit more of the image inside the window. The current zoom level is displayed in the center of the bar:
As I mentioned at the beginning, resizing images for email or the web means making sure both the pixel dimensions and the file size are small enough. Since most digital cameras these days take photos that would be too large for emailing or uploading to a website, it means that in pretty much all cases, we'll need to make the image smaller than its original size. After all, if the image was already small enough, we wouldn't need to resize it!
It also means we'll need to change the actual number of pixels in the image, a process known as resampling. When we resample an image to make it smaller, it's known as downsampling (the opposite, making the image larger, is called upsampling).
The Initial File Info
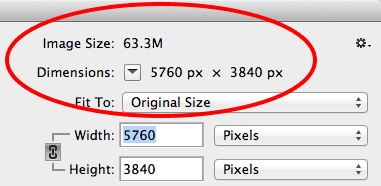
If we look at the top of the Image Size dialog box (to the right of the preview window), we find the initial file size and pixel dimensions of our image. The Image Size section tells us the current file size, in megabytes (M), while the Dimensions section shows us the pixel dimensions (px). Here we can see that my image is currently taking up 63.3 megabytes in memory, much too large for email or web viewing. Its pixel dimensions are 5760 x 3840. Considering that a typical computer display these days has pixel dimensions of around 1920 x 1080 or smaller, there's no way a 5760 x 3840 px image would fit on the screen (without needing to zoom out):
The Resample Option
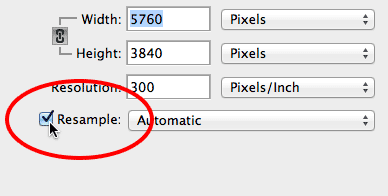
Let's focus on reducing the pixel dimensions of the image, which will take care of the file size for us (since fewer pixels will mean a smaller file size). As I mentioned, changing the number of pixels means resampling the image, so the first thing we need to do is make sure the Resample option is turned on (checked). You'll find it directly below the Width, Height and Resolution options. It should be turned on by default, but if not, click inside its checkbox to select it. You can think of resampling as "redrawing" the image, since Photoshop will need to analyze the image and then redraw the pixels:
Choosing The Resample Method
To the right of the Resample option is a selection box set by default to Automatic. This is where we choose the resample method (or more technically known as the interpolation method) which tells Photoshop how to analyze and redraw the pixels:
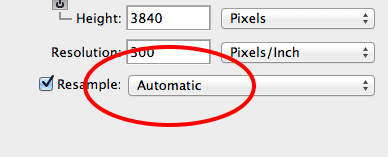
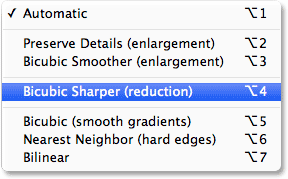
Different resample methods will give you different results - some better, some worse - based on whether you're upsampling or downsampling the image. The good news is, you really don't need to know much about the various resample methods to get great results with Photoshop CC because, by leaving this option set to Automatic, Photoshop will choose the best resample method for you. However, since it's always nice to know what's actually going on, if you click on the word Automatic, you'll open a list of the various resample methods we can choose from. For downsampling images, as we're most likely doing when resizing for email or the web, the best method to choose is Bicubic Sharper (it even says "reduction" beside it). You can select it yourself if you want, but if you simply leave the option set to Automatic, Photoshop will automatically select Bicubic Sharper when it detects that you're downsampling the image, so there's really no need to change it:
Choosing Pixels For The Measurement Type
Next, since we're dealing with pixels here, set the measurement type for the Width and Height options to Pixels if they're not set to that already:
The Constrain Aspect Ratio Option
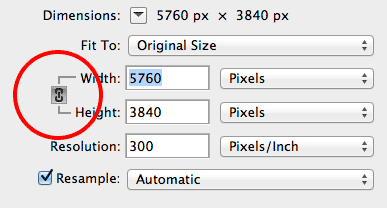
To reduce the number of pixels in the image, all we need to do is enter new pixel values into the Width and Height boxes. But before we do, if you look to the left of the Width and Height options, you'll see a small link icon. This is the Constrain Aspect Ratio option (also known as the Constrain Proportions option), and with it selected (as it is by default), the Width and Height options are linked together, meaning that if we enter a new value for the Width, Photoshop will automatically enter a corresponding value for the Height (and vice versa) to maintain the aspect ratio of the original image. If you click the link icon to uncheck this option, you'll be able to enter new Width and Height values independently of each other but at the risk of distorting the shape and appearance of the image. In most cases, you'll want to leave this option selected:
Entering New Width And Height Values
The only thing left to do now is figure what our new pixel dimensions should be. When resizing images for email or the web, you won't always know exactly what dimensions to enter. The only information you may have to go on is knowing that a typical computer display these days has pixel dimensions of 1920 x 1080 or less, so in order for our image to fit entirely on a typical display, we'll need to enter a new width no larger than 1920 pixels and a new height not greater than 1080 pixels. You may even want to go smaller than that if you know that the person you're emailing the photo to has a smaller display, whereas some photo sharing websites like Flickr can display images larger than 1920 x 1080, so it really depends on where you're planning on sending the image.
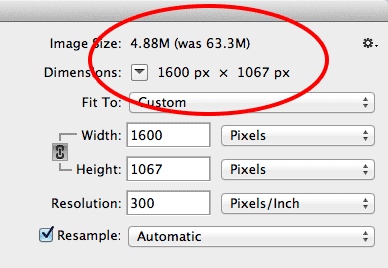
Let's say I decide I want the new width of my image to be 1600 pixels, which will easily fit on most displays. To resize it, with the measurement type for the Width and Height set to Pixels, all I need to do is double-click inside the Width box to highlight the current value, then enter in my new value of 1600. As soon as I do, Photoshop automatically selects a new Height value to maintain the photo's original aspect ratio. In this case, it chose 1067 pixels:
If we look up at the Image Size and Dimensions information at the top of the dialog box, we see that the pixel dimensions have been reduced from the original 5760 x 3840 pixels down to 1600 x 1067 pixels, and at the same time, the file size has dropped significantly, from 63.3 megabytes all the way down to just 4.88 megabytes. It's important to note that when you go to save the resized image later as a JPEG, the file size will be reduced even further:
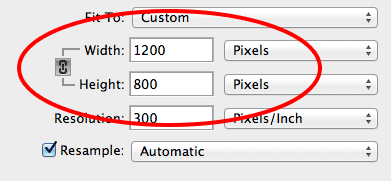
You can do the same thing with the Height value. If you know, for example, that you don't want the height of your image to be more than, say, 800 pixels, simply double-click inside the Height box to highlight the initial value, then enter in your new value of 800. Again, because we have the Constrain Aspect Ratio option turned on, Photoshop will automatically enter a corresponding Width value, which in this case is 1200 pixels:
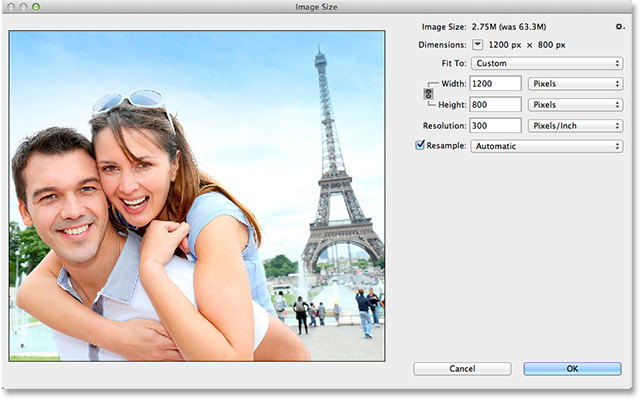
Feel free to experiment with different Width and Height values as much as you want to see how your changes affect the overall file size, since no changes are actually made to the image until you click the OK button. As long as you're still inside the Image Size dialog box, all you're really seeing is a preview of your changes. And speaking of previews, you'll notice that as you try different sizes, the size of the image in the preview window will also change:
Resizing By Percent Instead Of Pixels
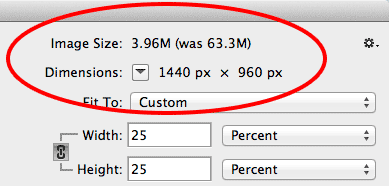
You can also resize the image based on a percentage of its original size. Simply change the measurement type for the Width and Height from Pixels to Percent, then enter a percentage value. For example, here I've entered 25 percent for the Width. Once again, Photoshop automatically changes the Height value for me:
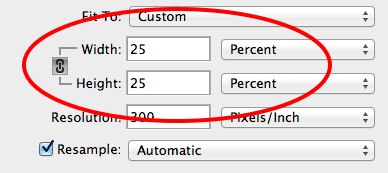
At the top of the dialog box, we see that resizing the image to just 25 percent of its original size has reduced the pixel dimensions down to 1440 x 960 pixels and reduced the file size from 63.3 megabytes down to 3.96 megabytes. As I mentioned, saving the resized image as a JPEG later will reduce the file size even more:
The Resolution Value
If you look directly below the Width and Height options, you'll find the Resolution option, and you may have noticed that no matter what width and height values you've entered, or whether you've been resizing by pixels or percent, the resolution value has not changed (for me, it's been set to 300 Pixels/Inch the whole time):
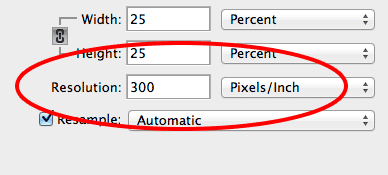
When resizing images for email, the web or any sort of screen output, the Resolution value is meaningless, and that's because it's used only in the world of printing. It tells your printer how many of the pixels in your image to print inside every inch of paper, but has no effect on how an image looks on screen. When viewing images on any sort of screen display, the only thing that matters is the pixel dimensions of the image, and since we're resizing images here specifically for screen output, not print output, we can safely ignore the Resolution value.
You can read more about how the Resolution value affects the print size of your image in our How To Resize Images In Photoshop CC tutorial, and why it has no effect on how your image looks on screen in our article on The 72 PPI Web Resolution Myth.
If at any point you want to clear the changes you've made in the Image Size dialog box and reset the image back to its original size, press and hold the Alt (Win) / Option (Mac) key on your keyboard. This will change the Cancel button in the lower right corner of the dialog box to Reset. Click the Reset button to set everything back to the way it was initially (of course, you can also just press the Cancel button if you change your mind completely and want to close out of the dialog box without making any changes):

When you're happy with the new width and height of your image and you're ready to commit your changes, click the OK button in the lower right corner:

And there we have it! That's how to easily resize images for email or the web using the redesigned Image Size dialog box in Photoshop CC (Creative Cloud)!