
Rotate, Flip and Scale Individual Letters In Text With Photoshop
Photoshop makes it easy to rotate, flip and scale entire words or lines of text in a document, but what if we want to transform only a single letter in a word, or transform different letters differently, rotating some, flipping others horizontally or vertically, and scaling others? It sounds like it should be a fairly straightforward job for Photoshop's Free Transform command, yet if you've ever tried doing it, you know that it isn't as straightforward as it would seem. Let's take a look at the problem.
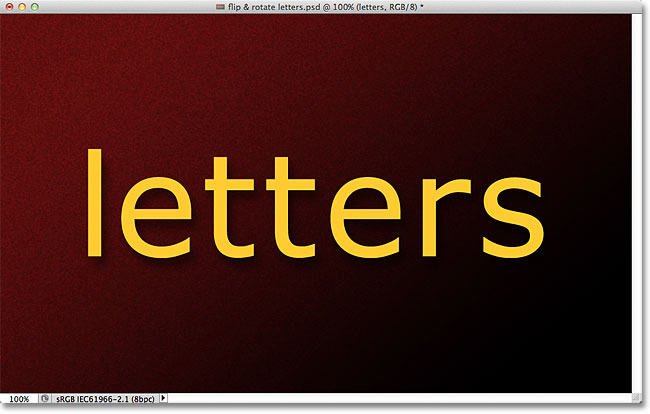
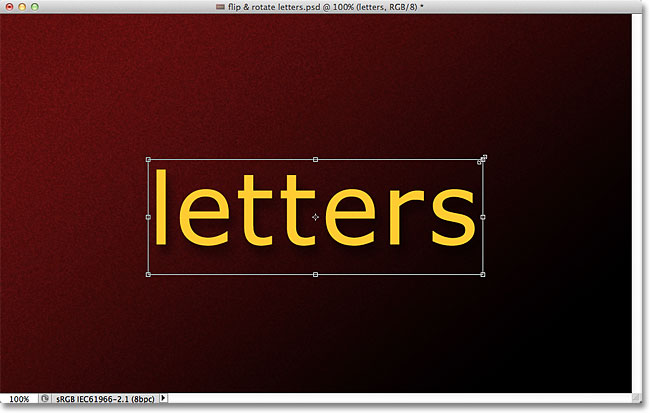
Here's a document I have open on my screen - a simple design with the word "letters" in front of a gradient background:
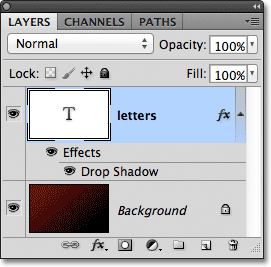
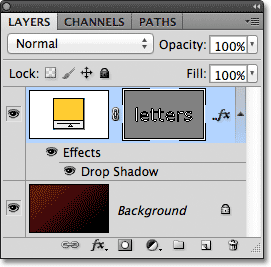
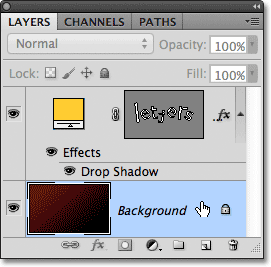
If we look at my Layers panel, we see that the document is made up of two layers - a normal Type layer on top containing the word "letters" (with a drop shadow layer style applied to add some interest) and the gradient on the Background layer below it:
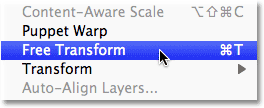
Usually, to flip, rotate or scale the text, we would use Photoshop's Free Transform command. I'll select it by going up to the Edit menu in the Menu Bar along the top of the screen and choosing Free Transform:
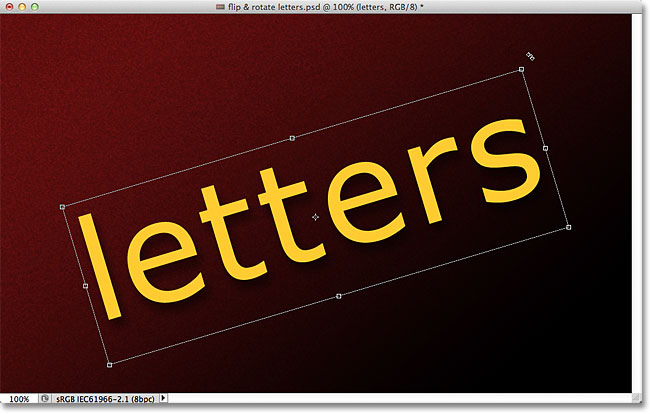
This places the Free Transform bounding box and handles around the word, and herein lies our problem. I want to transform individual letters in the word, but Free Transform selects the entire word as a whole, placing the bounding box and handles around it. If I move my mouse cursor outside the bounding box, then click and drag with my mouse to rotate it, the entire word rotates, not just an individual letter:
I'll press the Esc key on my keyboard to cancel the rotation. Let's try flipping a letter upside down. With Free Transform still active, I'll right-click (Win) / Control-click (Mac) anywhere inside the document and I'll choose Flip Vertical from the menu that appears:
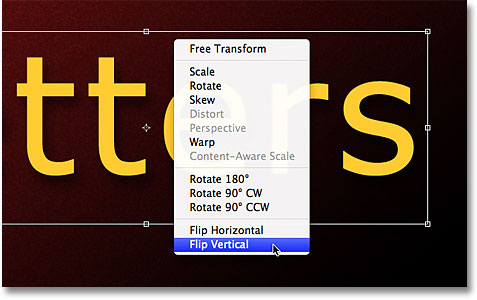
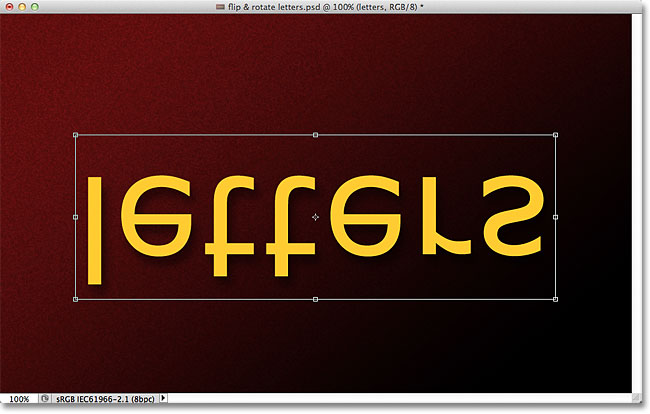
Again, we run into the same problem. Free Transform is affecting the entire word, so the entire word gets flipped upside down:
I'll press Esc on my keyboard to cancel the Flip Vertical command. Let's try scaling a letter. I'll hold down Shift+Alt (Win) / Shift+Option (Mac) as I click on one of Free Transform's corner handles and I'll drag inward towards the center of the bounding box. Holding the Shift key down as I drag will keep the original proportions of the text intact as I resize it, while the Alt (Win) / Option (Mac) key tells Photoshop to scale the text from its center. And no surprise, we run into the same problem as before. The entire word is being scaled down as a whole:
It may seem like Free Transform is the problem here since it doesn't give us any way of selecting individual letters in the word, but the real problem is actually the text itself. Or, more specifically, the problem is that the word is text. That may sound strange. I mean, of course it's text, right? Yet it's a problem because Photoshop doesn't allow us to select individual letters in a line of text. At least, not while the text is still text, which brings us to the solution. All we need to do to be able to work with individual letters is convert the text into something else!
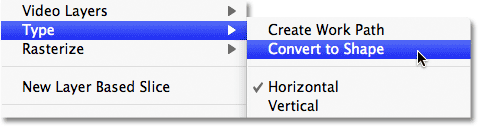
So what can we convert it into and still have it look like text? Well, we could convert it into pixels by rasterizing it, but that's not the best solution because we'll loose the sharp, crisp edges of the letters, especially once we start rotating and scaling them. A much better solution is to convert the text into a shape. As a shape, it will still look like text, and it will keep its sharp edges no matter what we do to it. The only minor downside is that once we've converted the text into a shape, it will no longer be editable, so just make sure you have everything spelled correctly first.
To convert text into a shape, make sure the Type layer is selected in the Layers panel, then go up to the Layer menu at the top of the screen, choose Type, then choose Convert to Shape:
Nothing much will seem to have happened in the document window, but if we look in the Layers panel, we see that the Type layer has been converted into a Shape layer, which means our text has successfully been converted into a shape:
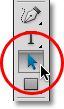
With the text now a shape, we can easily select any of the individual letters. To select a letter, we need the Path Selection Tool (the black arrow) which you can grab from the Tools panel:
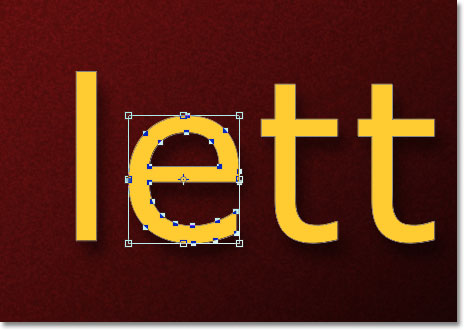
Then, with the Path Selection Tool in hand, simply click on the letter you want. I'll click on the first letter "e" in the word to select it. Anchor points (little squares) will appear around the letter to show that it's now selected:

With the letter selected, I can now transform it any way I want using Free Transform. I'll press Ctrl+T (Win) / Command+T (Mac) on my keyboard to quickly bring up the Free Transform bounding box and handles (it's faster than choosing Free Transform from the Edit menu), and this time, rather than appearing around the entire word, they appear around the letter I selected:
I'll rotate the letter the same way I rotated the entire word earlier, by clicking anywhere outside the Free Transform bounding box and dragging with my mouse. I'll rotate it counterclockwise. When you're done transforming a letter, press Enter (Win) / Return (Mac) to accept the change and exit out of Free Transform:

I'll do the same thing with the second letter "e" in the word. First, I'll select it by clicking on it with the Path Selection Tool, then I'll press Ctrl+T (Win) / Command+T (Mac) to bring up the Free Transform box and handles around it. To rotate it, I'll click outside the bounding box and drag with my mouse. This time, I'll rotate the letter clockwise. When I'm done, I'll press Enter (Win) / Return (Mac) on my keyboard to accept the change and exit out of Free Transform:

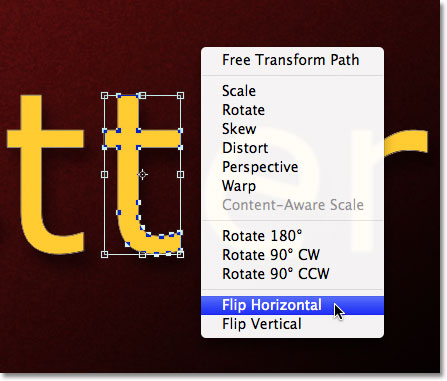
What if I want to flip a letter, either horizontally or vertically? With the text now a shape, it's easy! Again, I just need to click on the letter with the Path Selection Tool to select it. I'll select the second letter "t" in the word. Then I'll press Ctrl+T (Win) / Command+T (Mac) to place the Free Transform box and handles around it. To flip the letter, I'll right-click (Win) / Control-click (Mac) anywhere inside the document and I'll select one of the two options (Flip Horizontal or Flip Vertical) from the bottom of the menu that appears. I'll choose Flip Horizontal:
I'll press Enter (Win) / Return (Mac) to accept the change, and just like that, the letter is flipped:

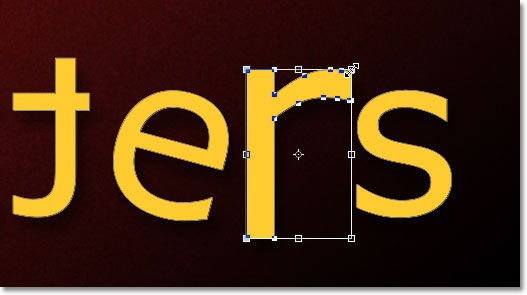
To scale (resize) a letter, again simply click on it with the Path Selection Tool, then press Ctrl+T (Win) / Command+T (Mac) to bring up Free Transform. Click on any of the four corner handles, hold down your Shift key to keep the original shape of the letter intact as you resize it, then drag the handle to make the letter larger or smaller. Hold down Alt (Win) / Option (Mac) as well while you're dragging the handle to resize the letter from its center. Here, I'm scaling the letter "r" and making it larger. Press Enter (Win) / Return (Mac) when you're done to accept the change:
Since the letters are shapes, not pixels, you can continue rotating, flipping and scaling them as much as you want without any loss of image quality, so feel free to keep selecting letters and playing around with Free Transform until you're happy with the results. You can also move the letters around inside the document if you need to simply by selecting them with the Path Selection Tool and dragging them around with your mouse. Free Transform isn't needed if all you're doing is moving a letter.
When you're done transforming and moving the letters around, click on any other layer in the Layers panel to deselect the shape. This will remove any visible outlines or anchor points from the letters. Since I only have two layers in my document, I'll click on the Background layer to select it:
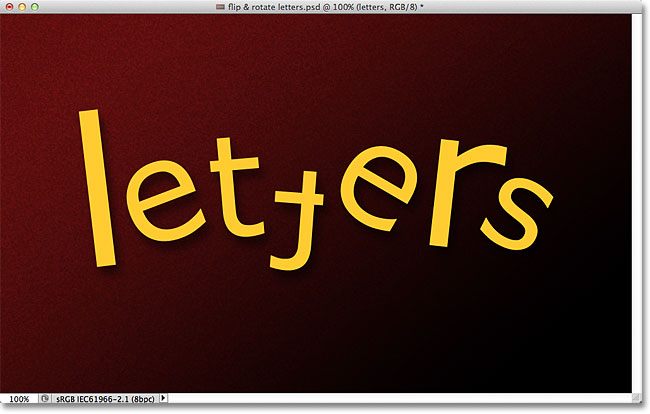
Here's what my word now looks like after scrambling up the letters a bit more with Free Transform:
Where to go next...
And there we have it! Check out our Text Effects or Photo Effects sections for more Photoshop effects tutorials!