
Photoshop Borders And Frames – Simple Solid Color Border
In this first in a series of tutorials on creating photo borders and frames in Photoshop, we'll learn how to add a simple but effective solid color border and thin stroke outline around an image. Even though the effect itself is quite basic and easy to create, this type of "minimalist" border often serves as a great compliment to black and white photos and helps draw attention to the image. Of course, it can be used with full color images as well. We'll start off by creating a white border with a thin black stroke outline. Then, we'll see how to easily switch things around and invert the colors to create a black border with a white stroke without needing to start all over again!
As with most things in Photoshop, there's several different ways to create this type of border, but the way I'll be showing here, using a Solid Color fill layer and a Stroke layer effect, is my favorite because it keeps everything fully editable, making it easy to go back and change the colors later. I'll be using Photoshop CS6 but this tutorial is fully compatible with any recent version including Photoshop CC (Creative Cloud).
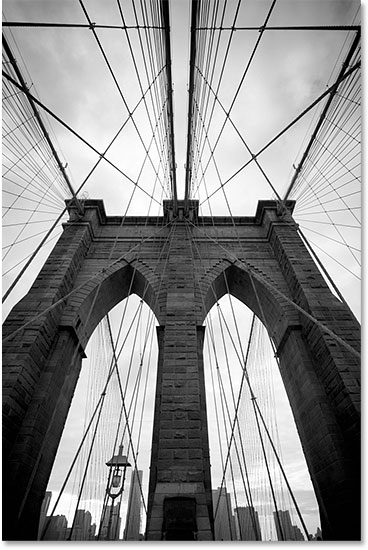
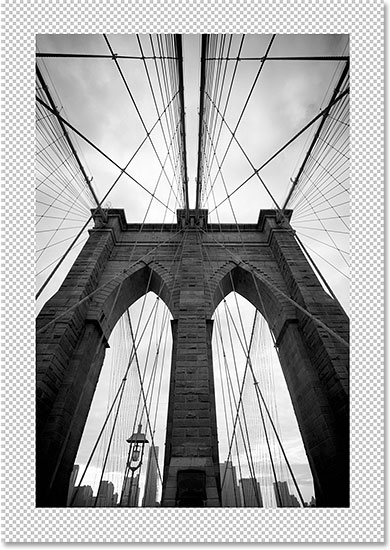
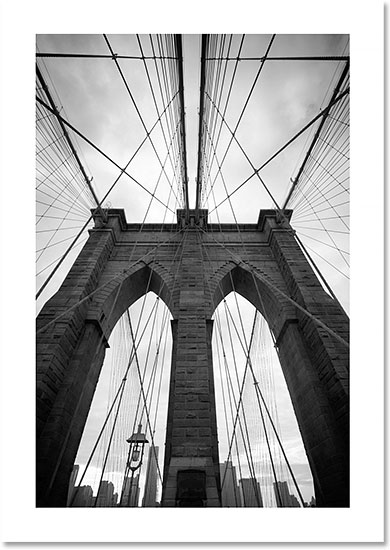
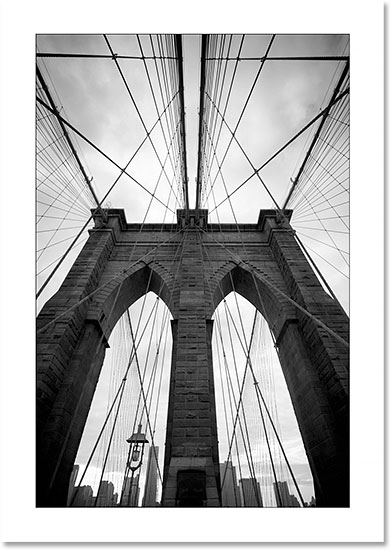
Here's the image I'll be working with (Brooklyn Bridge photo from Shutterstock):
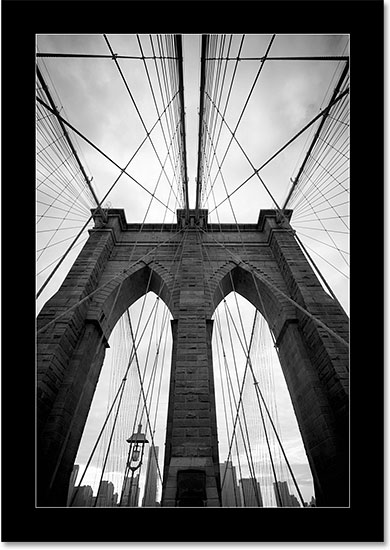
And here's an example of what the border effect will look like. This is the "black border with white outline" version, but as I mentioned, we'll also be creating a "white border with black outline" version and seeing how to easily switch between the two:
How To Create A Solid Color Photo Border
Step 1: Rename The Background Layer
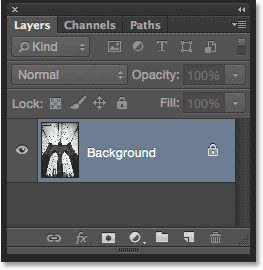
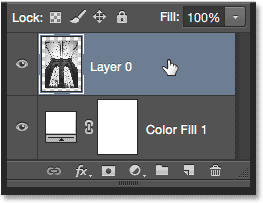
With the photo newly opened in Photoshop, we can see in the Layers panel that the image is sitting on the Background layer:
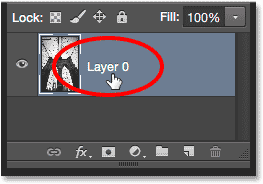
In a moment, we're going to add some transparency around the image. Problem is, Photoshop won't let us add transparency to the Background layer, but to easily get around this problem, all we need to do is rename the Background layer to something other than "Background", and the easiest way to do that is to press and hold the Alt (Win) / Option (Mac) key on your keyboard and double-click on the word "Background". Photoshop will instantly change the name to Layer 0. It's not the most descriptive name in the world, but for our purposes here, it's good enough:
Step 2: Add More Canvas Space
Next, we need to add extra space around the image to make room for our photo border. To do that, we'll use Photoshop's Canvas Size command. Go up to the Image menu in the Menu Bar along the top of the screen and choose Canvas Size:
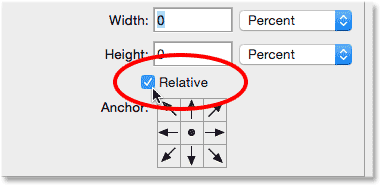
This opens the Canvas Size dialog box. First, make sure the Relative option is selected below the Width and Height values. This tells Photoshop to start with our current canvas size and add whatever amount we enter for the Width and Height to it:
With Relative checked, enter the border size you need into the Width and Height boxes. There's no one-size-fits-all value to add here since the size of the border will depend a lot on the size of your image and your own personal taste. I'm working with a fairly large photo, so I'll set both my Width and Height values to 2 Inches. Keep in mind that the Width value will be divided between the left and right sides, so in my case, entering 2 inches will add 1 inch to the left of the photo and 1 inch to the right. Same thing for the Height value. It gets divided between the top and bottom of the image, so a height of 2 inches adds 1 inch of space above the photo and 1 inch below it. In other words, whatever size you need for your border, enter twice that amount.
You could also change the measurement type to Pixels rather than Inches if you know the specific pixel dimensions you need, but usually I find inches is easier when adding a border. Also (very important!), make sure the center square is selected in the Anchor grid. This tells Photoshop to add the extra space evenly around the image:
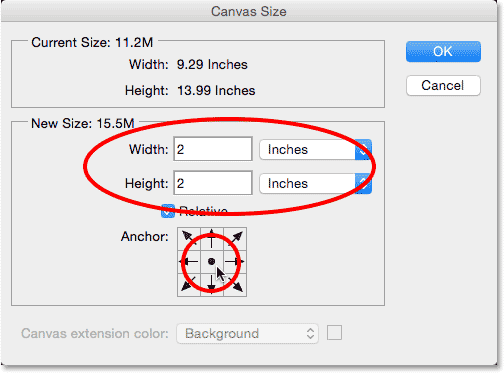
Click OK when you're done to close out of the Canvas Size dialog box, at which point Photoshop adds the extra space around the photo. It will appear as a gray and white checkerboard pattern which is Photoshop's way of displaying transparency. If you make a mistake with your initial Width and Height values, adding either too much or too little space around the image, just press Ctrl+Z (Win) / Command+Z (Mac) to undo the Canvas Size command, then go back up to the Image menu, re-select Canvas Size and try again:
Step 3: Add A Solid Color Fill Layer
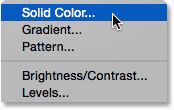
Next, we'll add one of Photoshop's Solid Color fill layers to serve as the color of our border. Click on the New Fill or Adjustment Layer icon at the bottom of the Layers panel:
Choose Solid Color from the top of the list that appears:
Photoshop pops open the Color Picker so we can choose the color we want for our fill layer. Choose white, then click OK to close out of it. Your document will temporarily be filled with white, blocking the photo from view, but we'll fix that in a moment:

Step 4: Drag The Fill Layer Below The Image
The reason the fill layer is blocking the image from view is because it's currently sitting above the image in the Layers panel. We need to move it below the image, so click on the fill layer (Color Fill 1) and, with your mouse button still held down, drag it downward towards the bottom of the image layer. Continue dragging downward until a highlight bar appears along the bottom of the image layer:
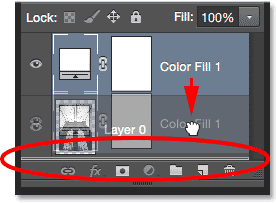
When you see the highlight bar, release your mouse button. Photoshop drops the fill layer into place below the image layer:
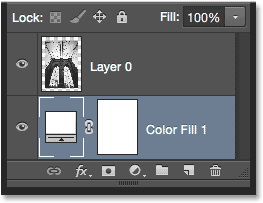
We can now see the white fill layer showing through the transparent areas around the image, creating our initial border effect:
Step 5: Select The Image Layer
Next, we'll add a thin black stroke around the edges of the image. Click on the image layer (Layer 0) in the Layers panel to select it:
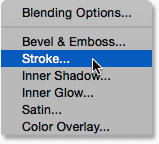
Step 6: Add A Stroke Layer Effect
With the image layer selected, click on the Layer Styles (fx) icon at the bottom of the Layers panel:
Choose Stroke from the list that appears:
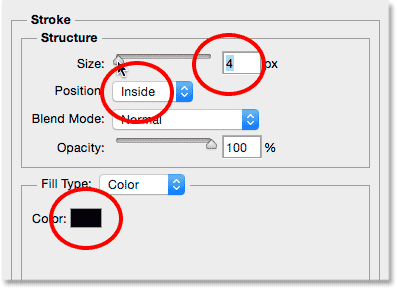
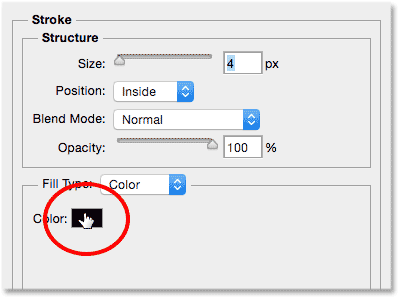
This opens the Layer Style dialog box set to the Stroke options in the middle column. Since our border is white, we'll add a black stroke around the edges of the image. If your stroke color isn't already set to black (it is by default in more recent versions of Photoshop), click on the color swatch directly to the right of the word Color and choose black from the Color Picker. Click OK to close out of the Color Picker when you're done. Then, to give the stroke sharp corners, change the Position option to Inside. Finally, increase the Size of the stroke to set its thickness. In most cases, you'll want a thin outline around the image, so smaller values will work best. I'll set my Size value to 4 px, but an even smaller value may work better with your image:
Click OK to close out of the Layer Style dialog box, and you're done! Here's what my image looks like surrounded by the white border and thin black stroke. Simple yet classy:
Inverting The Colors
What if, after seeing how the image looks with the white border, you think it might look better with a black border instead? Not a problem! In fact, the reason we used a Solid Color fill layer and a Stroke layer style to create the effect is because they make it easy to go back and switch the colors around!
To change the main border from white to black, just double-click on the fill layer's color swatch in the Layers panel:
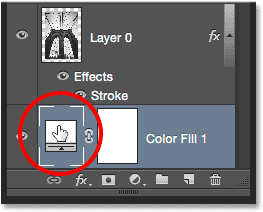
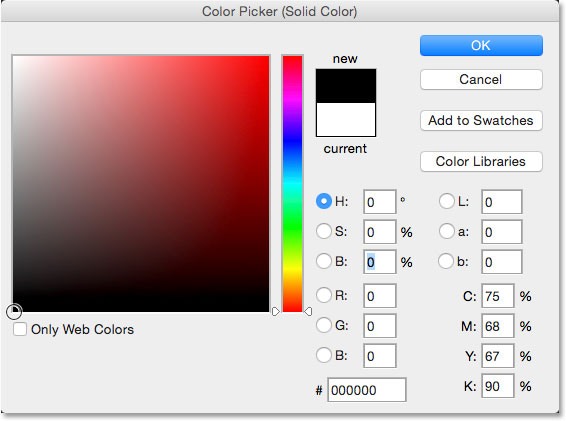
This re-opens the Color Picker, letting you choose a different color to fill the layer with. Choose black, then click OK to close out of the Color Picker:
Photoshop instantly changes the color of the border from white to black. Of course, the thin stroke around the edges of the image is also black so we can't really see it at the moment, but we'll fix that next:

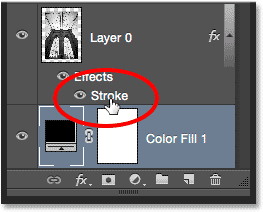
Since the main border is now black, we need to change the stroke outline around the edges to white. To do that, double-click on the word Stroke under the image layer in the Layers panel:
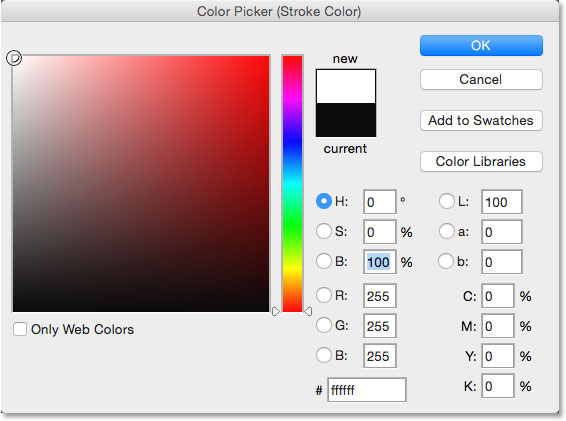
This re-opens the Layer Style dialog box once again set to the Stroke options. Click on the stroke's color swatch, currently set to black:
When the Color Picker opens, choose white as the new stroke color:
Click OK to close out of the Color Picker, then click OK to close out of the Layer Style dialog box, and you're done! With just a few clicks, we've reversed the colors of the effect, making the main border black and the stroke outline white:
Where to go next...
And there we have it! That's how to quickly and easily add a simple but effective solid color border and outline to an image with Photoshop! Visit our Photo Effects section for more Photoshop effects tutorials!