
How To Auto-Align And Composite Images In Photoshop
Written by Steve Patterson. How many times have you found yourself trying to choose between two similar photos of your subject where neither photo is perfect? It's a common problem with group shots where in one photo, someone's eyes are closed, and in the other, someone else is looking in the wrong direction.
Wouldn't it be great if, rather than being forced to choose between them, there was an easy way to merge the two images together, keeping only the best elements from each photo, to create that elusive, perfect shot? Fortunately, there is!
In this tutorial, we'll learn how to easily align and composite images in Photoshop. In fact, you may be surprised by just how easy it is to do since we're going to let Photoshop do much of the work for us. First, we'll use a command few people know about to automatically load our photos into the same document and place each one on its own independent layer. Then, we'll align the images using Photoshop's powerful Auto-Align Layers command. Finally, we'll use a layer mask to hide the unwanted areas in one photo and replace them with the better versions from the other photo!
I'll be using Photoshop CC (Creative Cloud) here but this tutorial is also fully compatible with Photoshop CS6.
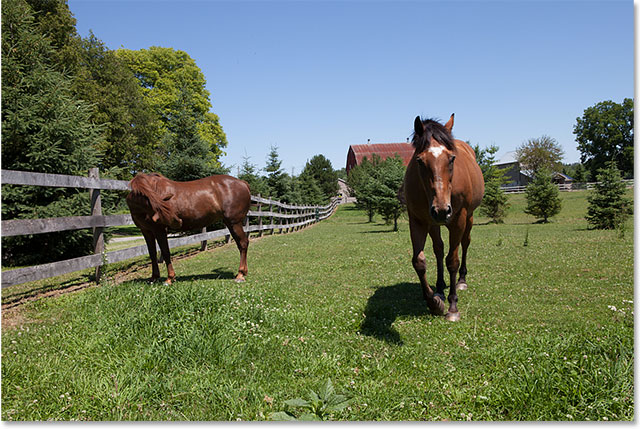
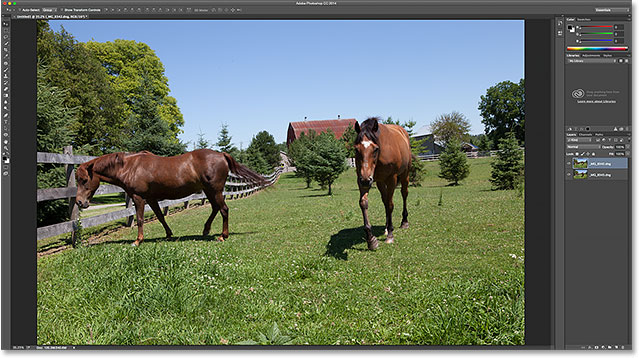
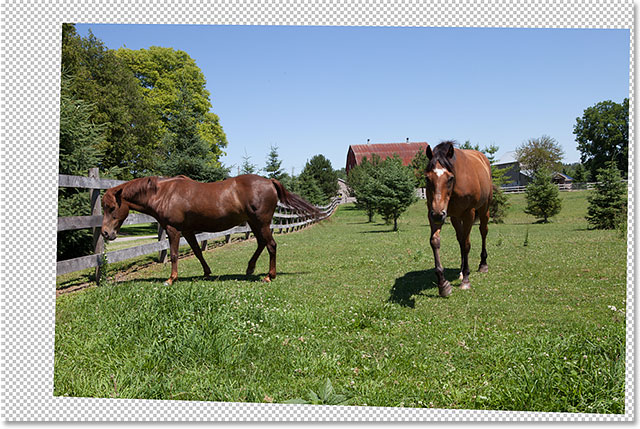
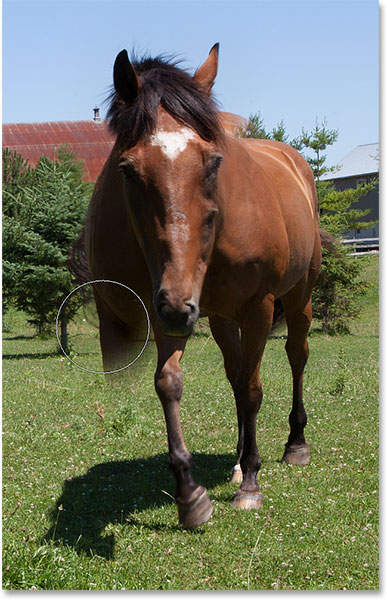
Here's the two photos I'll be working with, taken one sunny afternoon while driving around the countryside. In this first image, I like the horse on the right as it approaches and looks straight into the camera, but the horse on the left is looking down and showing me nothing but the top of its head:
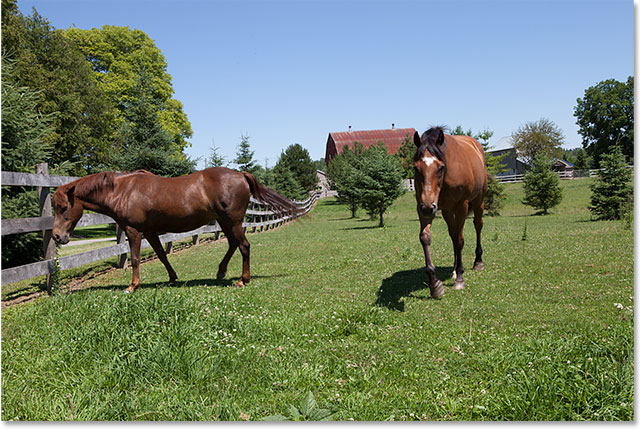
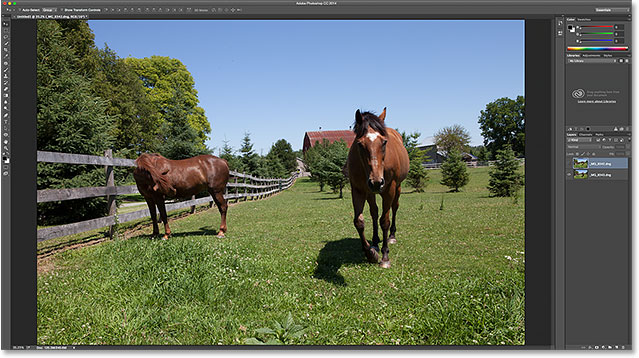
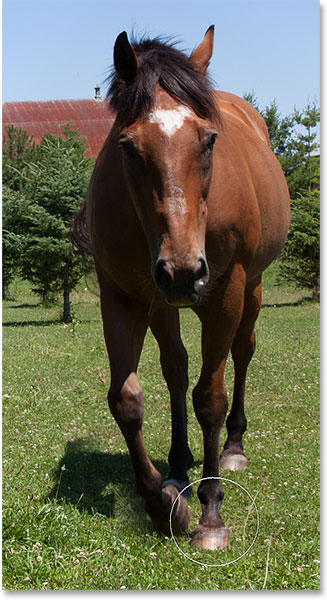
This second photo, taken a few seconds earlier, gives me a better view of the horse on the left, but the horse on the right is further back in the frame and not as interesting as it was in the first shot:
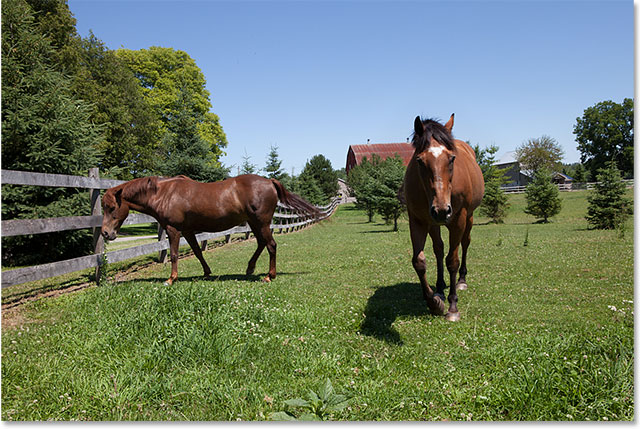
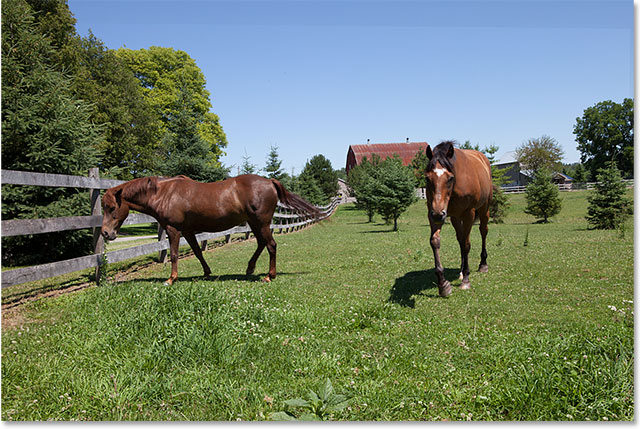
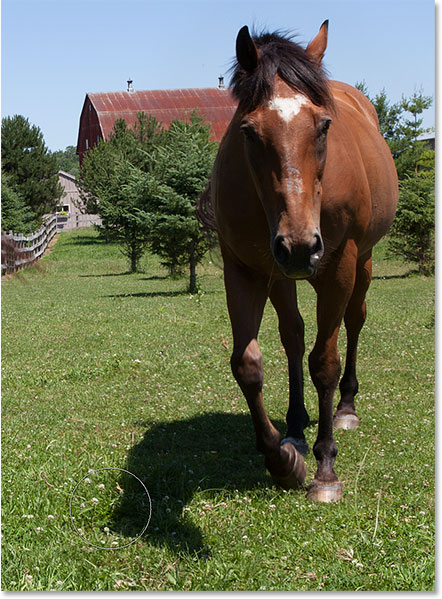
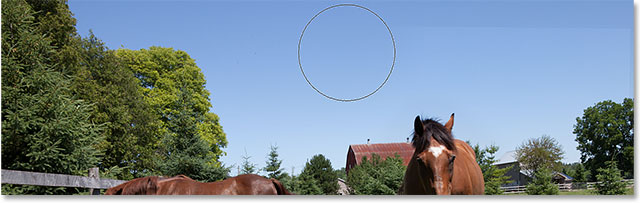
What I'd like to do is combine the best elements from both versions, taking the horse on the right from the first photo and merging it with the horse on the left in the second photo. Here's what the final composite version will look like:
You can use the same steps we're about to learn to align and merge all kinds of images, from family and group shots to animals and pets, landscape and nature photos, or whatever the case may be, so feel free to follow along with your own images. Let's get started!
Step 1: Load Both Images Into The Same Document
Before we can align and merge our photos, we first need a way to get them both into the same document, with each image on its own separate layer. There's actually an easy way to do this, but few people know about it. Simply go up to the File menu in the Menu Bar along the top of the screen, choose Scripts, and then choose Load Files into Stack:
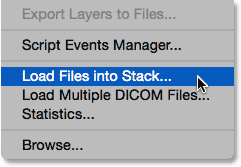
If "Load Files into Stack" sounds confusing (which it does), think of it instead as "Load Files into Layers" because that's exactly what the script does; it opens two or more images into the same document and places each image on its own layer. In fact, there's a command in Adobe Bridge named "Load Files into Photoshop Layers" that does the same thing, but for this tutorial, we'll stick with Photoshop.
Once you've selected the script, Photoshop will pop open the Load Layers dialog box. This is where we tell Photoshop which images to open. Click the Browse button:
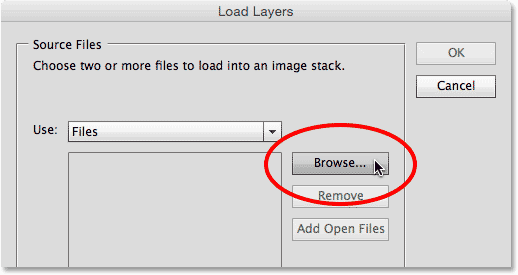
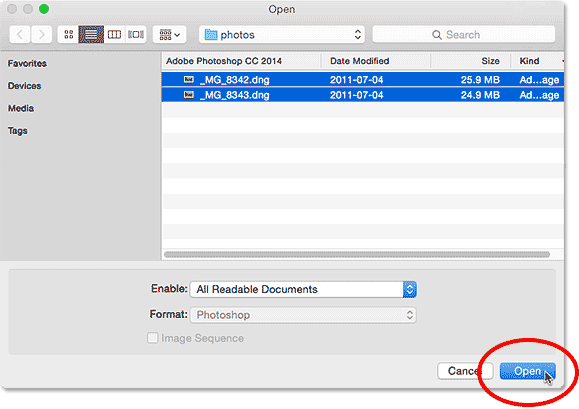
Navigate to the folder on your hard drive where the images you want to merge are located. In my case, both of my photos are in a folder on my Desktop. I'll click on the first image to select it, then I'll press and hold my Shift key and click on the second image. This selects both images at once. With both of your photos selected, click the Open button:
You'll see your selected images listed in the center of the Load Layers dialog box. Click OK to load them into Photoshop:

It may take a few moments, but both images will be loaded into the same document, each on its own layer. Since the photos are sitting one above the other, we can only see one of them at a time in the main document area:
If we look in the Layers panel, though, we see that, sure enough, both photos are there. The one on the top layer is the one currently visible in the document, but if you click on its visibility icon to the left of the layer, you'll temporarily turn it off, revealing the other image below it:
With the top layer turned off, the image on the bottom layer is now visible in the document. Click the same visibility icon again to turn the top image back on:
Learn all about layers in Photoshop!
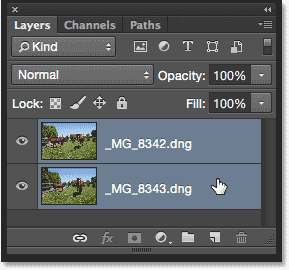
Step 2: Select Both Layers
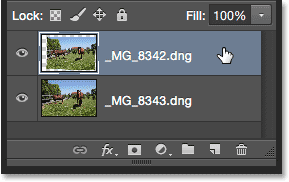
In a moment, we're going to align the images, but to do that, we first need to have both layers selected. Click on the top layer in the Layers panel to select it if it isn't selected already. Then, press and hold your Shift key and click on the bottom layer. This will select both layers at once:
Step 3: Auto-Align The Layers
With both layers selected, go up to the Edit menu at the top of the screen and choose Auto-Align Layers:
This opens the Auto-Align Layers dialog box. Photoshop is quite capable of doing an amazing job when aligning images, so we'll let it do all the work. Leave the Projection option at the top set to Auto (the default setting), then click OK:

Again, it may take a few moments, but when it's done, your photos should be aligned with each other. You can click on each layer's visibility icon in the Layers panel to toggle it on and off and see what changes Photoshop has made to get them aligned. I'll click on my bottom layer's visibility icon to turn that layer off temporarily:
This lets me view just the top image, and here we can see that to get both photos aligned, Photoshop resized and rotated the top image. The checkerboard pattern around the image is Photoshop's way of representing transparency:
I'll click the same visibility icon once again to turn the bottom layer back on:
And now, we see just how great of a job Photoshop has done. There is a noticeable horizontal line cutting across the image near the top where the shade of blue in the sky doesn't match between photos, but I'll fix that in a moment. Overall, Photoshop did an amazing job:
Step 4: Select The Top Layer
Now that our images are aligned, we can use a layer mask to hide the unwanted areas in the top image and reveal the better versions from the image underneath. Click on the top layer in the Layers panel to select it, which deselects the bottom layer at the same time:
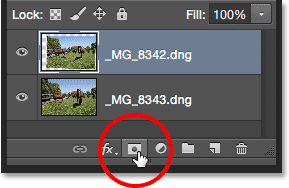
Step 5: Add A Layer Mask
Click on the Add Layer Mask icon at the bottom of the Layers panel:
Nothing will happen to the image in the main document area, but a white-filled layer mask thumbnail appears on the top layer in the Layers panel. If you want to learn more about how layer masks work, be sure to check out our full Understanding Layer Masks in Photoshop tutorial:

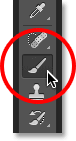
Step 6: Select The Brush Tool
To hide the unwanted areas, we'll need to paint on the layer mask with a brush. For that, we'll need Photoshop's Brush Tool. Select the Brush Tool from the Tools panel along the left of the screen:
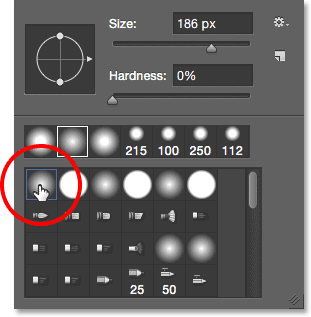
Step 7: Choose A Soft Round Brush
With the Brush Tool selected, click on the Brush Presets icon in the Options Bar along the top of the screen:
This opens Photoshop's Brush Preset Picker. Double-click on the first thumbnail (the one in the top left) to select the soft round brush. Double-clicking both selects the brush and then closes out of the Brush Preset Picker:
Step 8: Set Your Foreground Color To Black
In order to hide areas on the top layer, with need to paint on the layer mask with black. Photoshop uses the Foreground color as the color of the brush, so to quickly set your Foreground color to black, first press the letter D on your keyboard to make sure your Foreground and Background colors are set to their defaults for working with layer masks. This sets your Foreground color to white and your Background color to black. Then, to swap them so your Foreground color is black, press the letter X on your keyboard.
You can see your current Foreground and Background colors in the color swatches near the bottom of the Tools panel. Your Foreground color swatch is the one in the upper left. It should now be filled with black:
Step 9: Paint Over Areas To Hide Them And Reveal The Image Underneath
With a soft round brush in hand and black as the Foreground color, simply paint over any areas in the top image that you want to hide and replace with the same area from the image below it. In my case, I want to replace the horse on the right with the better version of the horse from the other image, so I'll begin painting over the horse. Since I'm painting on the layer mask, not on the image itself, we won't see the black color of my brush strokes. Instead, the top horse begins to disappear in the areas I'm painting over, replaced by the better version of the horse below it. It looks a bit like a science experiment gone wrong at the moment, but it will look better when I'm done:
Helpful Tips
Here's a few handy tips to help you out as you're painting on the mask. To change the size of your brush from the keyboard, press the left bracket key ( [ ) repeatedly to make it smaller or the right bracket key ( ] ) to make it larger. To change the hardness of the brush, press and hold the Shift key while pressing the left bracket key to make the edges softer or the right bracket key to make them harder.
If you make a mistake and paint over an area you didn't mean to, press the letter X on your keyboard to swap your Foreground and Background colors, making your Foreground color white. Paint with white over the mistake to bring back the image on the top layer. Then, press X again to switch your Foreground color back to black and continue painting away other areas.
I'll continue painting over the area until I've completely replaced the horse in the top image with the same horse from the bottom image:
I also want to make sure I swap out the shadow being cast by the horse, so I'll paint over that area as well:
Comparing The Original And Composite Versions
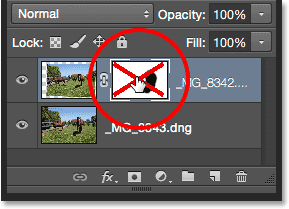
If you want to compare the original and composite versions, you can temporarily turn off the layer mask by pressing and holding your Shift key and clicking on the layer mask thumbnail in the Layers panel. A red "X" will appear letting you know the mask has been disabled:
With the mask disabled, we see the original, unedited version:

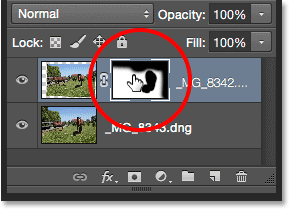
Press and hold Shift and click again on the layer mask thumbnail to turn the mask back on and view the composite version:

To fix that harsh, horizontal line near the top of the image where the shade of blue doesn't match between images, I'll press the right bracket key ( ] ) on my keyboard a few times to make my brush size larger, and with my brush edge still nice and soft, I'll simply paint across that line to create a smooth transition between the photos:
Viewing The Layer Mask In The Document
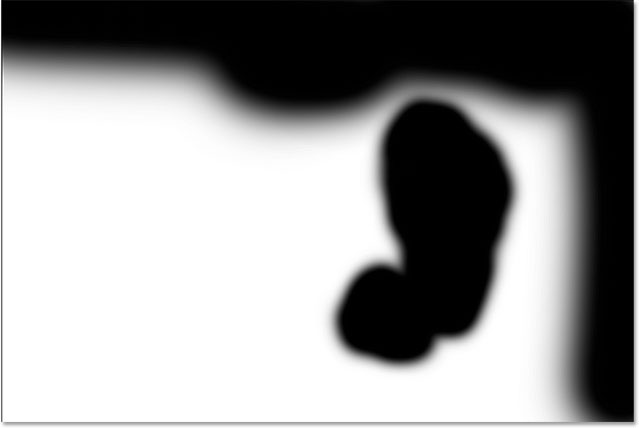
If you want to view the actual layer mask itself in the document so you can see exactly where you've painted, press and hold the Alt (Win) / Option (Mac) key on your keyboard and click on the layer mask thumbnail in the Layers panel:
This temporarily replaces your image in the document with the layer mask. White represents the areas where the top image remains visible. Areas you've painted over to reveal the image on the bottom layer appear in black. Here, we can see where I've painted over the horse and the sky, and I've also painted along the right edge to smooth out a few more harsh transition edges:
To hide the layer mask and switch back to your image, once again press and hold your Alt (Win) / Option (Mac) key and click on the layer mask thumbnail. And with that, we're done! Here is my final composite of the two original photos:
And there we have it! That's how to easily open, align and merge two images together using the little-known Load Files as Stack command, the powerful Auto-Align Layers command and a simple layer mask in Photoshop! Check out our Photo Retouching section for more Photoshop image editing tutorials!