
Create A Mirror Image Effect With Photoshop
In this Photoshop tutorial, we'll learn how to create a classic mirror image effect with any photo by turning one side of the image into a mirror reflection of the other! This popular effect is often used in album covers and movie posters, and as we'll see, it's very simple to achieve. As always, I'll cover every step along the way so that even if you're a beginner, you can easily follow along!
This version of our Mirror Image Effect tutorial has been fully updated for both Photoshop CS6 and Photoshop CC. If you're using an earlier version of Photoshop, you can still follow along with this version, or you may wish to check out the original version.
Here's the image I'll be using (rock girl with guitar photo from Fotolia):

Here's how the mirror image effect will look when we're done:

Let's get started!
How To Mirror An Image With Photoshop
Step 1: Rename The Background Layer
If you've newly opened your image in Photoshop as I have, you'll see it not only in the main document area but also in the Layers panel. It's sitting on the Background layer, currently the only layer in the document:
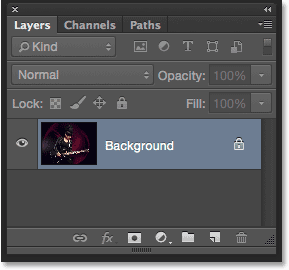
The Background layer in Photoshop is special. It's treated differently from other layers and has its own rules about what we can and can't do with it. One of things we can't do is move the contents of the Background layer around inside our document. That's a problem because we need to be able to move our image to create the effect.
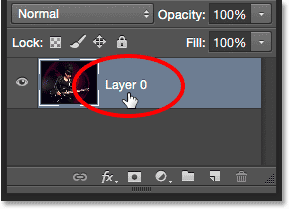
Fortunately, there's an easy solution. All we need to do is change the name of the Background layer to anything other than "Background". The quickest way to do that is by pressing and holding the Alt (Win) / Option (Mac) key on your keyboard and double-clicking directly on the name "Background". Photoshop will instantly rename it "Layer 0". It's not the most descriptive name in the world, but for our purposes, it works:
Watch the video and share your comments on our YouTube channel!
Step 2: Add More Canvas Space
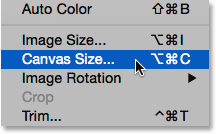
Now that we can freely move our image around, let's give it some actual room to move by adding more canvas space around it. Go up to the Image menu in the Menu Bar along the top of the screen and choose Canvas Size:
This opens Photoshop's Canvas Size dialog box. First, select the Relative option by clicking inside its checkbox. This tells Photoshop to start with our current canvas size and simply add more space to it. Then set the Width to 100 Percent (make sure you change the measurement type to Percent, not Pixels or anything else). We only need to add canvas to the left and right sides of the image so leave the Height set to 0 Percent. Finally, make sure the center box is selected in the Anchor grid, which tells Photoshop to add the extra space evenly on both sides:
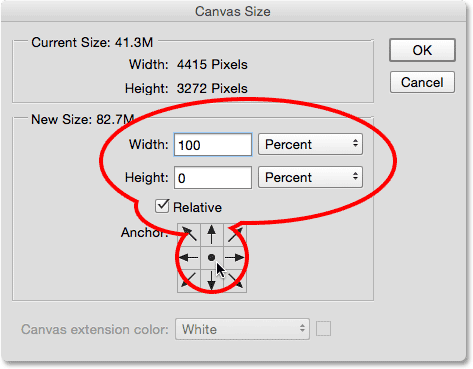
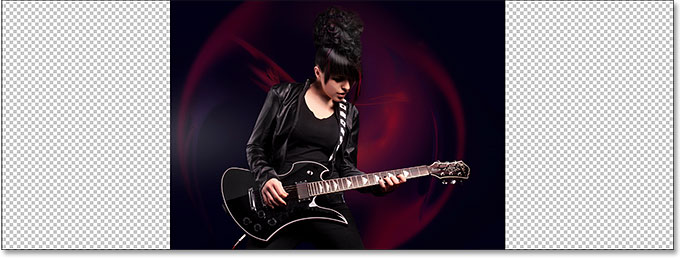
Click OK to close out of the Canvas Size dialog box, at which point Photoshop doubles the width of our canvas, adding 50% of the new space to the left side of the image and 50% to the right side. The checkerboard pattern that fills the new space is Photoshop's way of representing transparency, which means there's nothing actually there. It's just empty space on the layer. Chances are, we've given ourselves more room here than we need, but that's okay. We'll trim away any extra space when we're done:
Step 3: Add A Vertical Guide Down The Middle
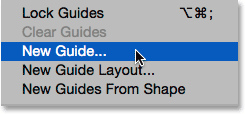
We need to know exactly where the vertical center of the document is located, so let's use one of Photoshop's guides to help us out. Go up to the View menu at the top of the screen and choose New Guide:
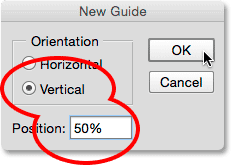
This opens the New Guide dialog box. Select Vertical for the Orientation, then enter 50% for the Position value:
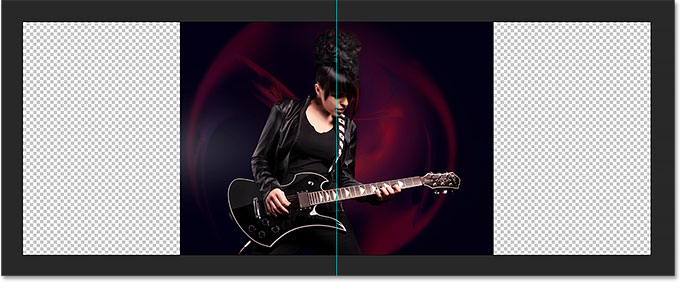
Click OK to close out of the dialog box. Photoshop places a vertical guide through the middle of the document, dividing it equally in half:
Step 4: Select The Move Tool
Select Photoshop's Move Tool from the top of the Tools panel along the left of the screen. You can also select the Move Tool by pressing the letter V on your keyboard:

Step 5: Drag Your Subject To One Side Of The Guide
Think of the guide we just added as the "flip point" for the mirror effect. In other words, everything we place on one side of the guide will be mirrored on the other side. With your Move Tool in hand, press and hold the Shift key on your keyboard and drag everything you want to mirror over to one side, either left or right depending on your subject. Pressing and holding the Shift key limits the direction you can drag in, making it easier to drag straight across.
In my case, since the girl in my photo is facing the right (her left, our right), and since I want to keep as much of her guitar in the effect as possible, I'll drag most of the image over to the right side of the guide, leaving only a small portion of it remaining on the left:
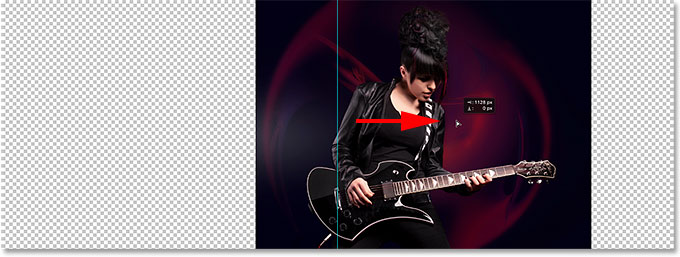
Here's a closer view of the image to make things easier to see. Notice where my guide cuts through the image. Everything to the right of the guide will be mirrored on the left. The remaining part that's currently on the left will be tossed away:

Step 6: Select The Image
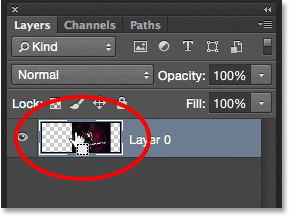
Next, we need to select just the image itself, not the empty transparent areas on either side of it. To do that, press and hold the Ctrl (Win) / Command (Mac) key on your keyboard and click on the layer's preview thumbnail in the Layers panel:
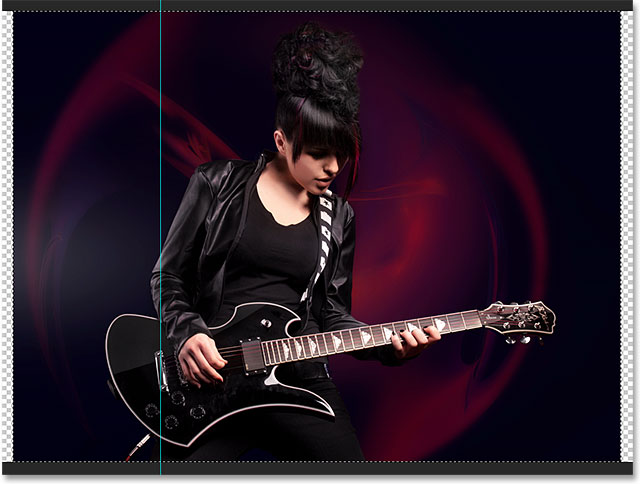
This places a selection outline (often referred to as "marching ants") around the image:
Step 7: Select The Transform Selection Command
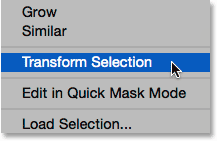
We've selected the entire image, but what we really need is to select just the side we want to mirror, which means we need to edit (reshape) our selection outline. Go up to the Select menu at the top of the screen and choose Transform Selection:
Step 8: Drag The Left Or Right Handle To The Guide
This places transform handles (little squares) around the selection outline. You'll find one in each corner, plus one at the top, bottom, left and right. The one we're interested in is the one on the side opposite the side we're mirroring. In other words, since everything I want to mirror is to the right of my guide, I need the handle on the left of the image. If you're mirroring everything on the left of your guide, you'll want the handle on the right of your image:
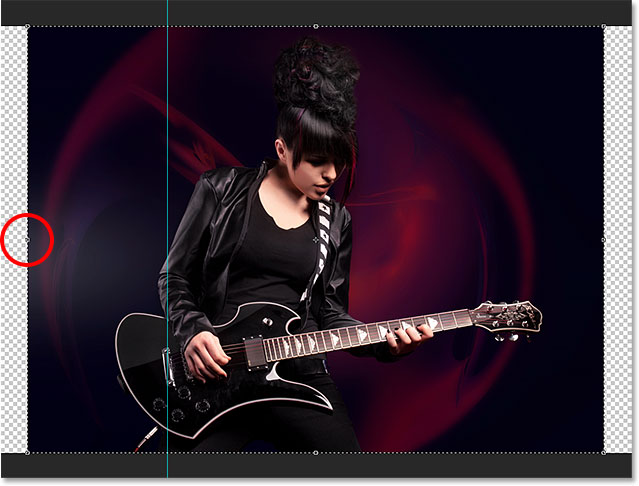
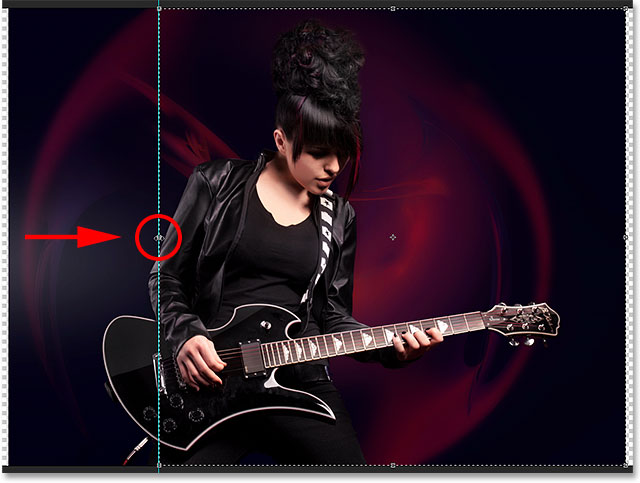
Click on this handle and, with your mouse button held down, drag it over to the guide. When you release your mouse button, you'll see that the shape of the selection outline has changed. Only the area you're mirroring remains selected. Press Enter (Win) / Return (Mac) on your keyboard when you're done to accept the transformation and exit out of the Transform Selection command:
Related: Transforming Selections In Photoshop
Step 9: Copy The Selection To A New Layer
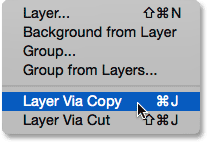
We need to copy our selection to a new layer. Go up to the Layer menu at the top of the screen, choose New, then choose Layer via Copy. Or, press Ctrl+J (Win) / Command+J (Mac) on your keyboard to select the same command with the shortcut:
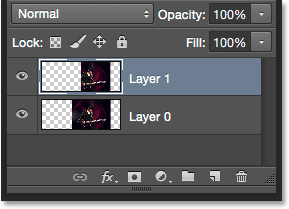
If we look in the Layers panel, we see that Photoshop has copied the selected area of the photo and placed it on a new layer named "Layer 1" above the original:
Step 10: Select The Free Transform Command
All we need to do now to create our mirror reflection is flip the contents of this layer. Go up to the Edit menu and choose Free Transform, or press Ctrl+T (Win) / Command+T (Mac) to select Free Transform from the keyboard:
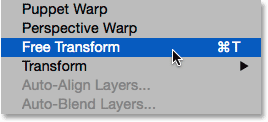
This places the Free Transform box and handles around the contents of the layer (similar to the Transform Selection handles we saw earlier). See that little target icon in the center of the box? That's the reference point, or the transform point; in other words, the point around which the transformation takes place:
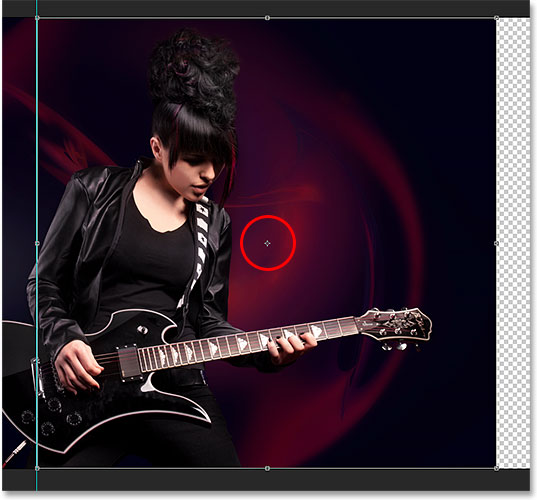
Click on the icon and, with your mouse button held down, drag it left or right (depending on your image) so it snaps into place over the handle that's on the same side as your guide:
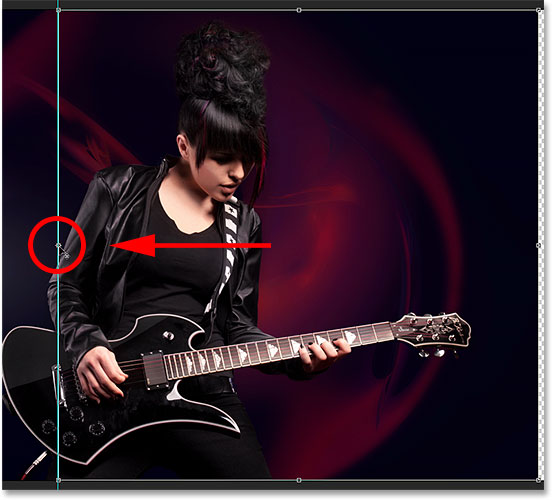
Step 11: Select The Flip Horizontal Command
With the reference point moved to the side, go back up to the Edit menu, choose Transform, then choose Flip Horizontal. You can also Right-click (Win) / Control-click (Mac) anywhere inside the Free Transform box and choose Flip Horizontal from the contextual menu. Either way works:
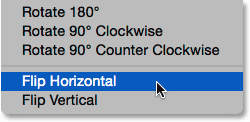
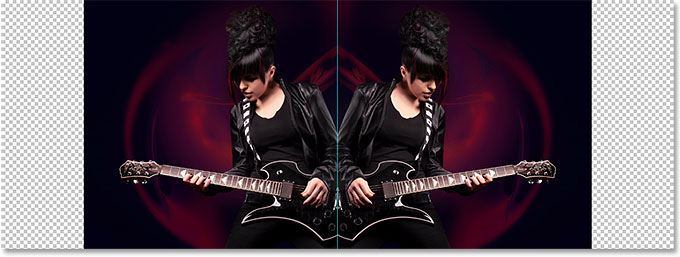
This flips the image horizontally so that everything on the one side of the guide is now mirrored on the other. Press Enter (Win) / Return (Mac) on your keyboard to accept the transformation and close out of the Free Transform command:
Related: Photoshop's Free Transform Command - Essentials Skills And Shortcuts
Step 12: Clear The Guide
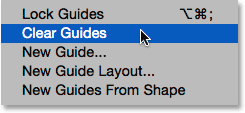
All that remains at this point are a couple of housekeeping tasks. We don't need our guide anymore, so to remove it, go up to the View menu and choose Clear Guides:
Step 13: Trim Away The Transparent Areas
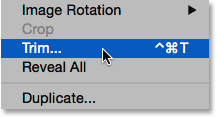
Finally, to remove the unwanted transparent areas from the sides of the image, go up to the Image menu and choose Trim:
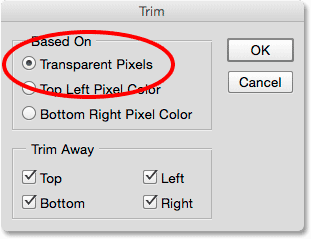
Photoshop pops open the Trim dialog box. Select Transparent Pixels at the top, then make sure all four checkboxes (Top, Bottom, Left and Right) are selected at the bottom:
Click OK to close out of the dialog box. Photoshop trims away the transparent areas on both sides, leaving us with our final "mirror image effect" result:

And there we have it! That's how to create a mirror image effect with Photoshop! Check out our Photo Effects section for more Photoshop effects tutorials!