
Photo To Detailed Sketch With Photoshop
Learn how to turn any photo into a sketch with lots of fine detail. Great for landscapes, architecture photos, still lifes, and more! And, learn how to complete the entire effect from start to finish in 60 seconds!
Written by Steve Patterson. In a previous Photoshop tutorial, we learned how to convert a photo into a color pencil sketch using a method that works especially well with portraits, since it tends to leave out small, unwanted details like wrinkles and other skin blemishes while focusing more on the main features we want to see, like the person's eyes, lips and hair.
Yet for other types of images (landscape or nature photos, buildings and architecture, still lifes, or really any image that doesn't focus on people), you'll often want the sketch to include those tiny details the previous method would ignore. So in this tutorial, we'll learn a different way to convert a photo to a sketch, one that's usually better suited for these other types of images since it often does an amazing job of bringing out fine details.
If you've already read through the previous Portrait To Color Pencil Sketch tutorial, you'll find that many of the steps here are the same. It's really just one change in one of the steps that makes all the difference. So as an added bonus for those already familiar with the previous tutorial, at the end of this one, we'll learn how to create the entire sketch effect from beginning to end in 60 seconds or less! However, to get the most from this tutorial, I encourage you to read through it from the beginning at least once, rather than jumping straight to the end, since the "60 seconds or less" version includes a lot of keyboard shortcuts (not everyone likes keyboard shortcuts) and skips over the details of how and why each step works.
This version of the tutorial is fully updated for Photoshop CC but is also compatible with any recent version of Photoshop. However, users of Photoshop CS5 or earlier may wish to check out the original Photo To Sketch With More Detail tutorial as well.
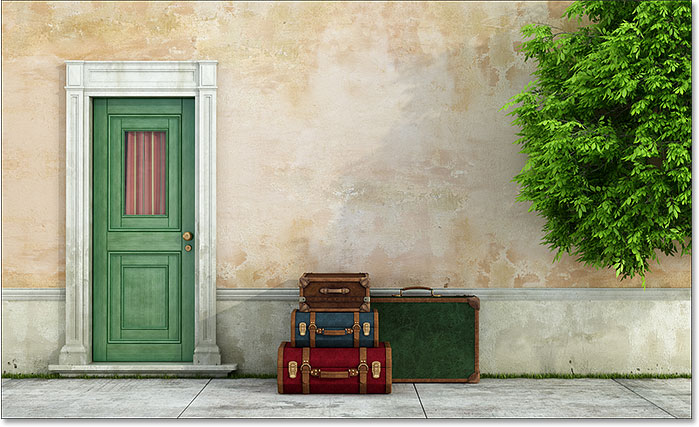
Here's the image I'll be using which I downloaded from Adobe Stock:
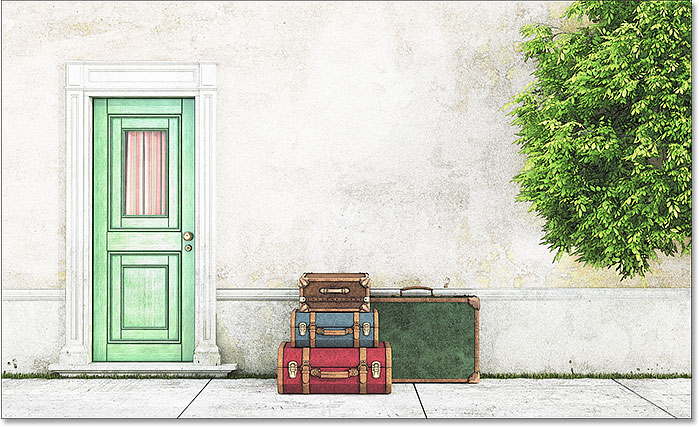
Here's how it will look after being converted to a pencil sketch. We'll start by converting the image into a black and white sketch, and then we'll learn how to colorize it using a few different layer blend modes, each giving us different results:
How To Create A Detailed Sketch Effect
Step 1: Duplicate The Background Layer
Let's begin by making a copy of our original image. We'll need the original again later when we go to colorize the sketch, so by working on a copy, we'll be able to keep the original safe from harm. If we look in the Layers panel, we see our image sitting all by itself on the Background layer, currently the only layer in the document:
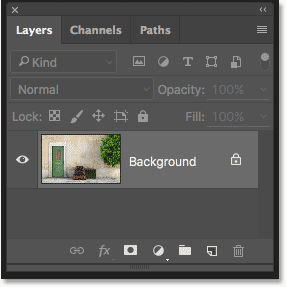
To make a copy of the Background layer, press the Alt (Win) / Option (Mac) key on your keyboard, then with the key still held down, click on the Background layer and drag it down onto the New Layer icon at the bottom of the Layers panel (second icon from the right):
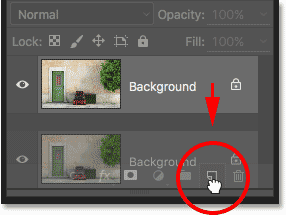
Release your mouse button, then release your Alt (Win) / Option (Mac) key (in that order). Normally, Photoshop would just go ahead and make a copy of the layer, but by adding in the Alt / Option key, we've told Photoshop to first pop open the Duplicate Layer dialog box, giving us a chance to name the layer before it's added. We're going to be removing the color from the layer using Photoshop's Desaturate command, so let's name this layer "Desaturate":
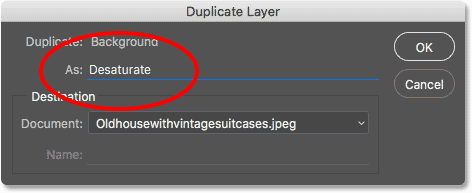
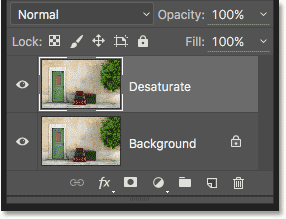
Click OK when you're done to close out of the Duplicate Layer dialog box. Photoshop makes a copy of the Background layer, names it "Desaturate" and places it above the original:
Step 2: Desaturate The Layer
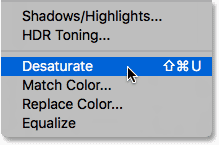
To remove the color from this layer, go up to the Image menu in the Menu Bar along the top of the screen, choose Adjustments, and then choose Desaturate:
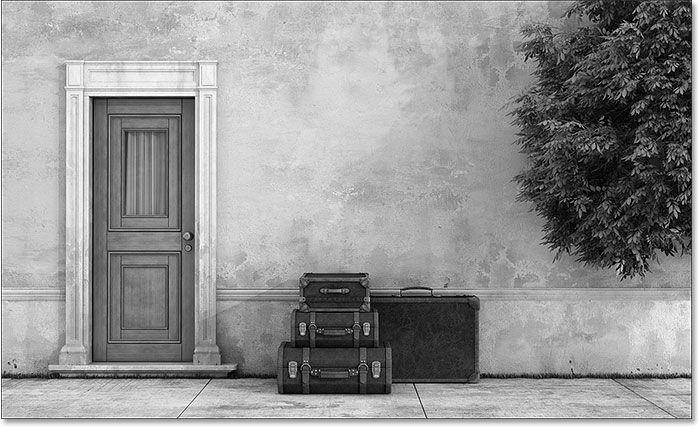
This instantly removes the color, leaving us with a quick black and white version of the image:
Step 3: Duplicate The "Desaturate" Layer
Next, we need to make a copy of our desaturated layer. Just as we did before, press the Alt (Win) / Option (Mac) key on your keyboard, then with the key still held down, click on the "Desaturate" layer in the Layers panel and drag it down onto the New Layer icon:
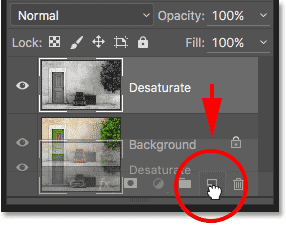
Release your mouse button, then release your Alt (Win) / Option (Mac) key. Photoshop once again pops open the Duplicate Layer dialog box so we can name the layer before it's added. We'll be inverting this layer, making light areas dark and dark areas light, so let's name it "Invert":
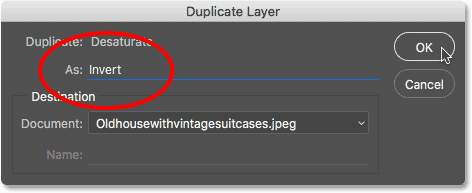
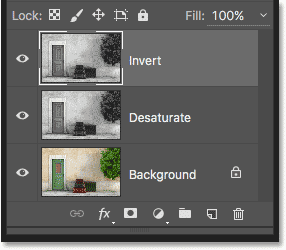
Click OK to once again close out of the Duplicate Layer dialog box. Photoshop adds the duplicate layer, names it "Invert" and places it above the other layers:
Step 4: Invert The Layer
To invert the layer, go back up to the Image menu at the top of the screen, choose Adjustments, and this time, choose Invert:
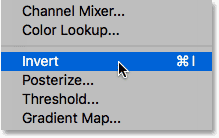
This inverts the brightness values, giving the image a film negative look:
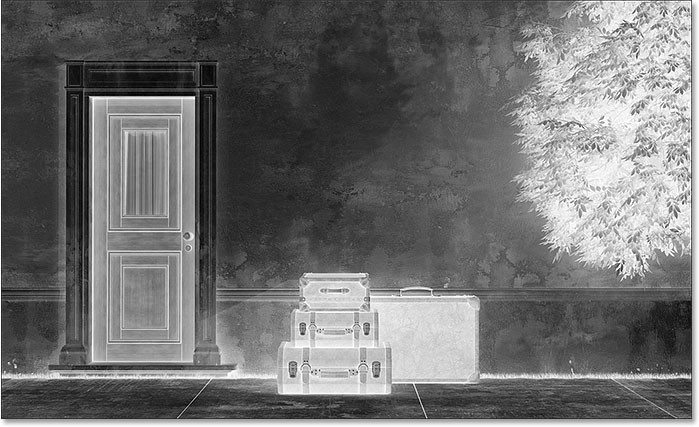
Step 5: Change The Layer Blend Mode To "Color Dodge"
The next thing we need to do is change the blend mode of our "Invert" layer. You'll find the Blend Mode option in the upper left of the Layers panel. By default, it's set to Normal, which means that the "Invert" layer isn't blending with the layers below it at all. It's just blocking them from view.
Click on the word "Normal" to bring up a menu of other blend modes we can choose from, then choose Color Dodge from the list:
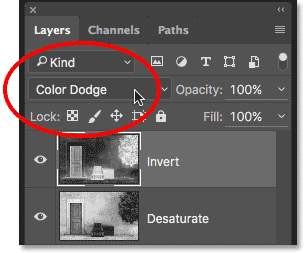
This turns the image completely white (you may see a few random areas of black depending on your image, but most of it should now appear white):
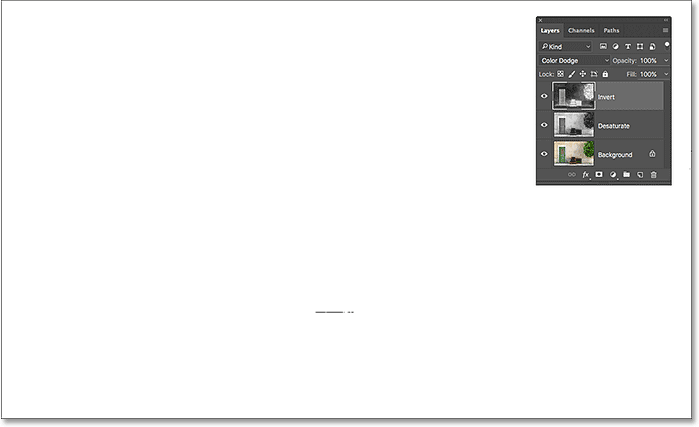
Step 6: Apply The "Minimum" Filter
If you read through the previous Photo To Color Pencil Sketch tutorial, you'll know that up to this point, the steps we've covered here have been pretty much the same. But this is where things change, and here's why.
If we were turning a portait photo into a sketch, as we did in the previous tutorial, we would create the effect by blurring the layer using Photoshop's Gaussian Blur filter. That method works great for portraits because it tends to hide many of the smaller, unwanted details. But it doesn't work very well when you want to keep those smaller details, as we do here.
To keep the detail, we need to use something different, so we'll use the Minimum filter. Just because it's called "Minimum" doesn't mean it's somehow the least of all filters in Photoshop. In fact, both the Minimum filter and its opposite, the Maximum filter, can be extremely useful. Both get their name from what they do. The Minimum filter chokes, or shrinks, white areas by thickening up and spreading out any areas of black. The Maximum filter does the opposite; it expands and spreads out the white areas to shrink the black areas. In other words, the Minimum filter minimizes white, while the Maximum filter maximizes white.
While the Minimum and Maximum filters are most often used when refining selections and layer masks, they have lots of creative uses as well. In fact, the Minimum filter is just what we need to help us with our sketch effect. To select it, go up to the Filter menu at the top of the screen, choose Other, and then choose Minimum:
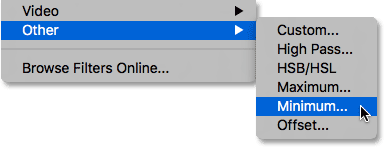
This opens the Minimum filter dialog box. As I mentioned, the Minimum filter shrinks the size of white areas by expanding and spreading out the black areas. We control how far the black areas spread out using the Radius slider along the bottom of the dialog box. The default radius value is 1 pixel, and for the best results with our sketch effect, ideally you'll want to leave it set to 1 pixel. This will create the thinnest lines possible in the sketch. You could, if you're working with a very large image and feeling adventurous, try increasing the value to 2 pixels, but you'll most likely find that it makes the lines too thick. A 1 pixel radius usually works best.
At the very bottom of the dialog box is the Preserve option (only available in Photoshop CC). By default, it's set to Squareness. If you have a lot of round shapes in your image, you can try changing it to Roundness which may help keep rounded edges from flattening out. I'll leave it set to Squareness:
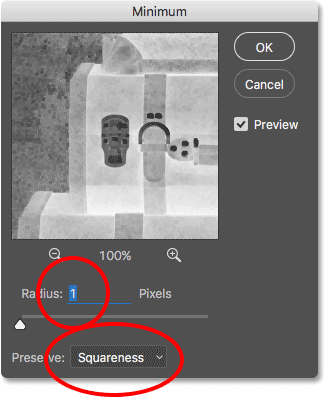
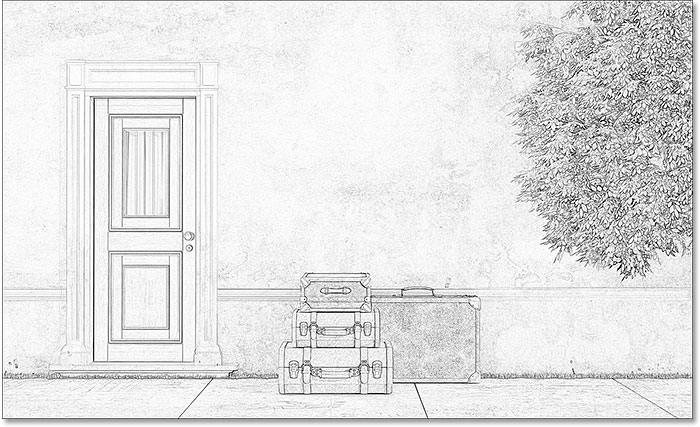
Click OK to close out of the dialog box, and instantly, we have our main sketch effect. Now, at this point, you may have noticed that something strange just happened. If you're viewing your image at anything less than the 100% zoom level, then depending on your zoom level and the size of your image, the effect you saw before clicking OK to close out of the Minimum dialog box may have appeared stronger than the effect you now see after clicking OK.
To show you what I mean, here's what my sketch effect looked like while I still had the Minimum filter open:
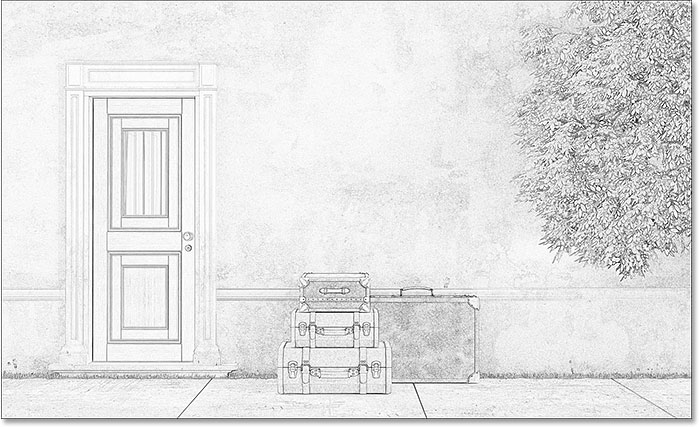
And here's how it looked after I clicked OK to close out of it. The difference here is subtle, but the overall effect now appears lighter and softer. Lines that were thicker and darker before are no longer as well-defined. If this happened to you, don't worry. It's simply the result of not viewing the image at the full 100% zoom level. We'll be darkening the image anyway in the very next step:
Step 7: Add A Levels Adjustment Layer
To darken up the sketch, we'll use a Levels adjustment layer. Click on the New Fill or Adjustment Layer icon at the bottom of the Layers panel:
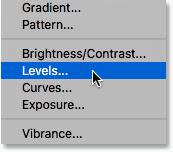
Choose a Levels adjustment layer from the list that appears:
Step 8: Change The Blend Mode To "Multiply"
The options and controls for the Levels adjustment layer appear in Photoshop's Properties panel. We could use them to darken up the sketch, but there's a faster and easier way. If you look again in the Layers panel, you'll see the new Levels adjustment layer ("Levels 1") sitting above the other layers. To darken the sketch, all we need to do is change its blend mode from Normal to Multiply:
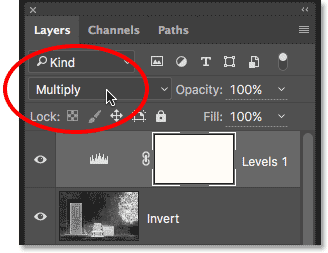
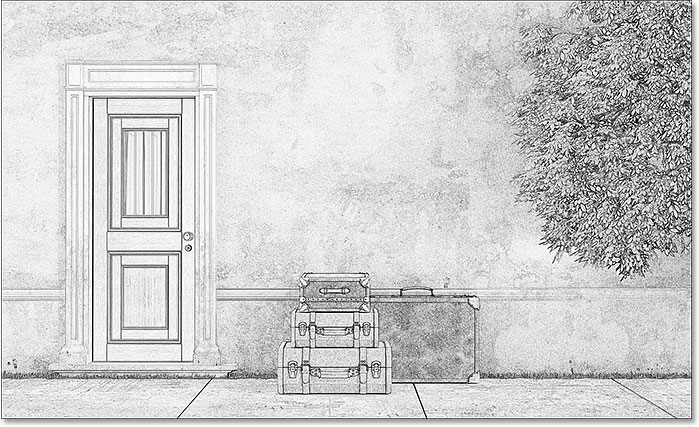
The Multiply blend mode is one of a group of blend modes in Photoshop that darken the image, and simply by changing the blend mode to Multiply, the sketch now appears darker:
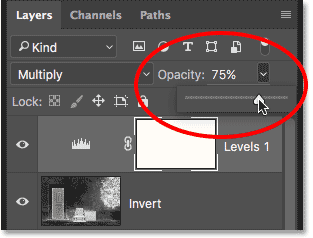
If you find that your sketch is now too dark, you can bring back some of the brightness by lowering the opacity of the Levels adjustment layer. You'll find the Opacity option in the upper right of the Layers panel. The default value is 100%. The lower you set it, the less impact the Levels adjustment layer will have on the image. I'll lower mine down to 75%:
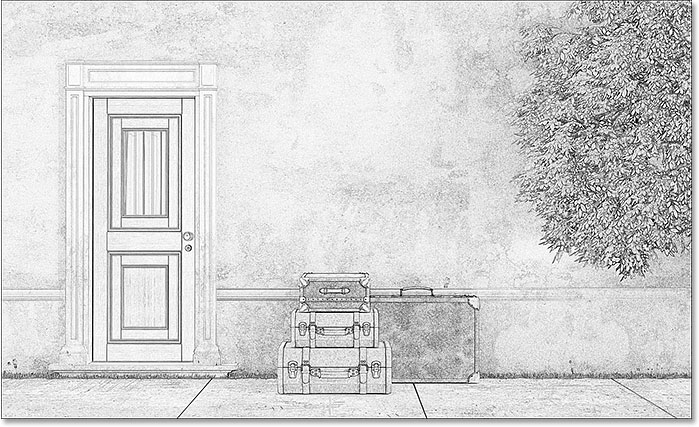
This brings back some of the original brightness:
Step 9: Duplicate The Background Layer
At this point, we've converted the photo into a black and white sketch. Let's see how we can colorize it using a few different layer blend modes, with each one giving us a different result.
We'll colorize the sketch using the photo's original colors. To do that, we'll need to make another copy of our Background layer. Once again press and hold the Alt (Win) / Option (Mac) key on your keyboard, then click on the Background layer in the Layers panel and drag it down onto the New Layer icon:
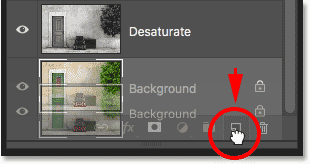
Release your mouse button, then release your Alt (Win) / Option (Mac) key. When the Duplicate Layer dialog box appears, name the layer "Color" (since we'll be using it to colorize the sketch), then click OK:

Photoshop makes a copy of the Background layer, names it "Color" and places it directly above the original:
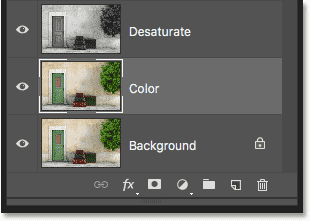
Step 10: Move The "Color" Layer To The Top Of The Layer Stack
We need to move the "Color" layer above all the other layers. One way to do that would be to click on it and drag it all the way up to the top, but there's a faster way using a keyboard shortcut. To jump the layer straight to the top of the stack, make sure it's selected in the Layers panel, then press Shift+Ctrl+right bracket ( ] ) (Win) / Shift+Command+right bracket ( ] ) (Mac). This instantly moves the "Color" layer to the top, directly above the Levels adjustment layer:
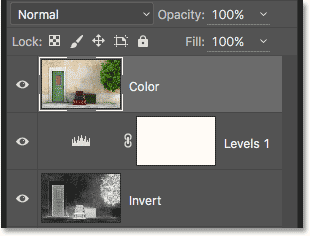
Step 11: Change The Blend Mode To "Color"
At the moment, the "Color" layer is completely blocking the sketch from view. To change that so we see only the color from the layer, simply change its blend mode from Normal to Color:
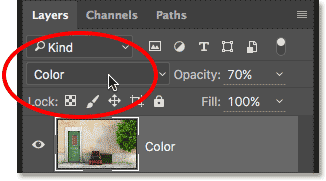
This gives us the first of our colorizing effects:

If the color looks too intense, you can reduce it by lowering the opacity of the "Color" layer. I'll lower mine down to 70%:
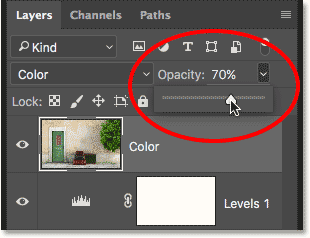
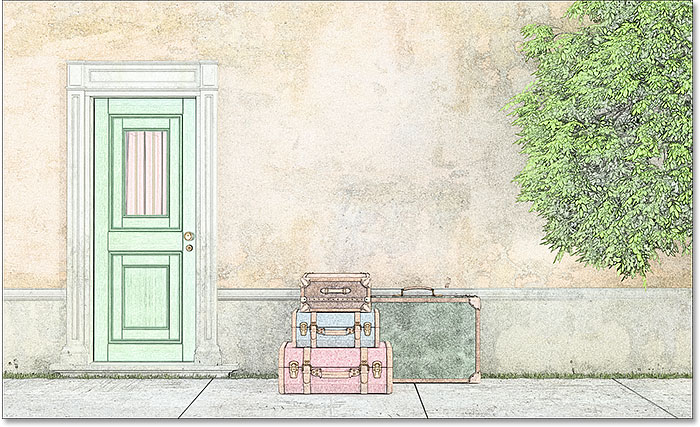
After lowering the opacity, the color appears more subtle:
Step 12: Try The "Overlay", "Soft Light" And "Hard Light" Blend Modes
For a different look to the sketch, try colorizing it using the Overlay, Soft Light or Hard Light blend modes. All three are part of a group of blend modes in Photoshop that boost image contrast, but they can also be used to blend and enhance color. As with the Color blend mode, once you've selected Overlay, Soft Light or Hard Light, you can then fine-tune the result by adjusting the layer's opacity.
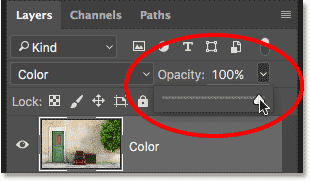
Before I change the blend mode, I'm going to first set my opacity value back to 100%:
Then, I'll change the blend mode from Color to Overlay:
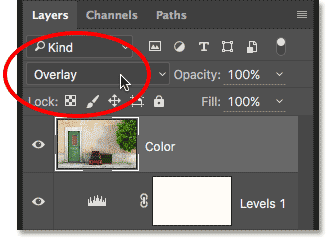
As I mentioned, the Overlay blend mode boosts image contrast, and here we see the effect it has on the sketch. The contrast is definitely stronger than before, and where the Color blend mode gave us almost pastel-looking colors, Overlay produces darker, more subdued colors:
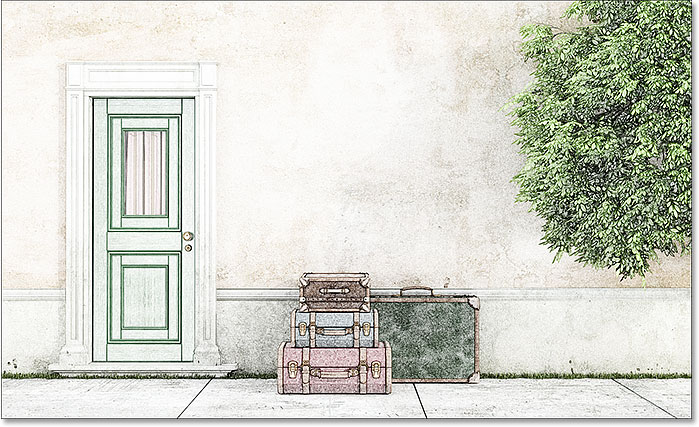
Next, I'll try the Soft Light blend mode:
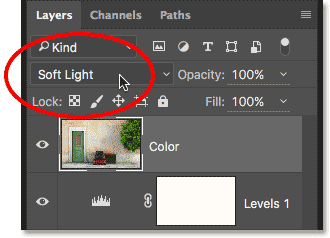
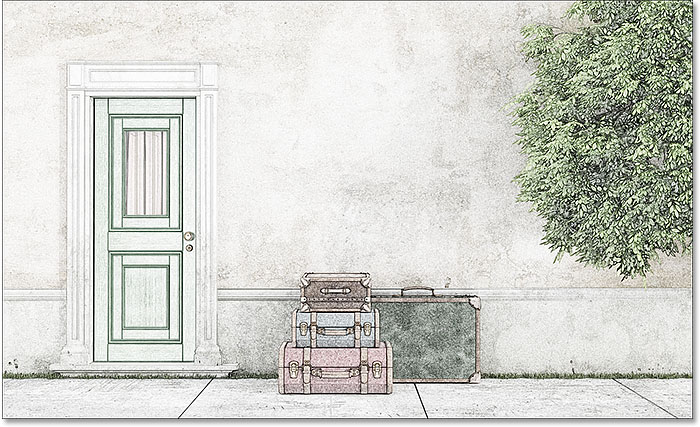
Soft Light is very similar to Overlay but the result is more subtle. The contrast is less intense and the colors are more muted:
Finally, I'll change the blend mode to Hard Light:
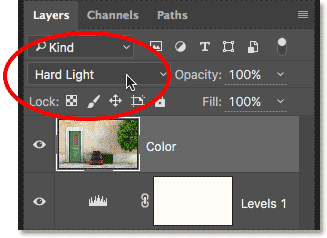
While Soft Light is a less-intense version of Overlay, Hard Light is the exact opposite, producing the strongest contrast and color of all three blend modes. In fact, with the layer opacity set to 100%, Hard Light can be too extreme:
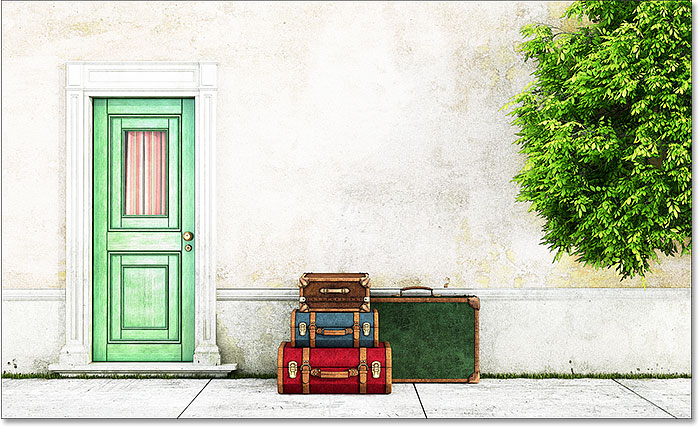
However, if we lower the opacity to tone down the impact of the Hard Light blend mode:
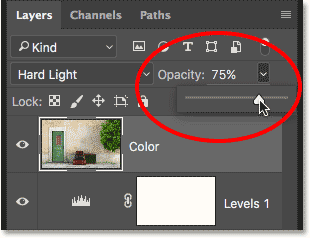
Things begins to look much better. Leaving the blend mode set to Hard Light but lowering the opacity to around 75% produces, at least in my opion and for this specific image, the best result:

Photo To Sketch In 60 Seconds Or Less
Now that we've covered the details of how to turn a photo into a sketch, as promised, here's how to create the exact same effect in 60 seconds or less (you'll get faster the more you do it). To cut down on time, we'll be taking advantage of keyboard shortcuts for most of the work, and we won't worry about renaming any of the layers.
Before we begin, make sure you have the Move Tool selected at the top of the Tools panel. The reason is that, in order to select Photoshop's layer blend modes from the keyboard, we need to have a tool selected that doesn't have its own blend mode options, like the Brush Tool, the Clone Stamp Tool, the Healing Brush Tool, and so on. If the tool itself has blend mode options, then changing the blend mode from the keyboard will change the tool's blend mode, not the layer's blend mode.
There's plenty of tools in Photoshop that don't have blend mode options, but since the Move Tool is one of them and it's sitting at the top of the Tools panel, it's the easiest one to select. You can quickly select it by pressing the letter V on your keyboard:

Then, with the Move Tool selected, just follow these steps:
Step 1: Press Ctrl+J (Win) / Command+J (Mac) to duplicate the Background layer.
Step 2: Press Shift+Ctrl+U (Win) / Shift+Command+U (Mac) to desaturate the layer.
Step 3: Press Ctrl+J (Win) / Command+J (Mac) to duplicate the desaturated layer.
Step 4: Press Ctrl+I (Win) / Command+I (Mac) to invert the layer.
Step 5: Press Shift+Alt+D (Win) / Shift+Option+D (Mac) to change the layer's blend mode to Color Dodge.
Step 6: Go to Filter > Other > Minimum. Leave the Radius value set to 1 pixel.
Step 7: Click the New Fill Or Adjustment Layer icon at the bottom of the Layers panel and choose Levels.
Step 8: Press Shift+Alt+M (Win) / Shift+Option+M (Mac) to change the blend mode to Multiply which darkens the image. Adjust the layer opacity as needed.
Step 9: Click on the Background layer in the Layers panel to select it. Press Ctrl+J (Win) / Command+J (Mac) to duplicate it.
Step 10: Press Shift+Ctrl+] (Win) / Shift+Command+] (Mac) to jump the layer to the top of the layer stack.
Step 11: Press and hold Shift+Alt (Win) / Shift+Option (Mac) and press C for the Color blend mode, O for Overlay, F for Soft Light, or H for Hard Light. Adjust the layer opacity as needed.
And there we have it! That's how to turn a photo into a more detailed sketch using the Minimum filter, along with a few image adjustments and layer blend modes, in Photoshop! Check out our Photo Effects section for more Photoshop effects tutorials!