
How To Use The Oil Paint Filter In Photoshop CC
The Oil Paint filter is back in Photoshop CC! Learn step-by-step how the Oil Painter filter's Brush and Lighting options make it easy to turn any photo into an oil-painted masterpiece!
Written by Steve Patterson. The Oil Paint filter was first introduced as an official filter in Photoshop CS6. But for whatever reason, it disappeared in the initial release of Photoshop CC. Thankfully, as of the November 2015 Creative Cloud updates, the Oil Paint filter is back! And even though it's essentially the same filter that it was back in CS6 (which isn't a bad thing), the CC version now sports a much smaller, less intimidating dialog box that makes using it seem easier than ever.
Now, I'll be the first to admit that I'm not a painter. And if you saw anything I've tried to paint, you'd be the second to admit I'm not a painter. But thanks to Photoshop and its Oil Paint filter, I don't have to be! I can still pretend I'm the next Vincent van Gogh without a shred of real-world evidence to support it. And while a Photoshopped oil painting effect may not fool any professional art dealers or ever hang on a gallery wall, turning one of your photos into an oil painting is still lots of fun, and the results can look very impressive.
Since the Oil Paint filter was only recently added back to Photoshop CC, you'll want to make sure that your copy is up to date before you continue, otherwise the filter may not be available.
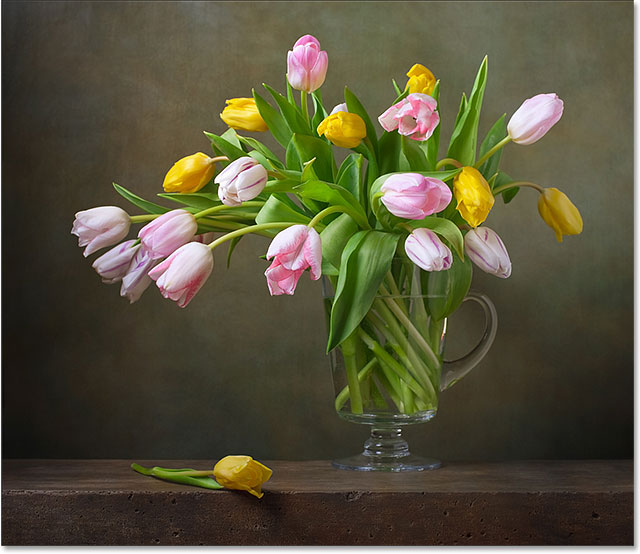
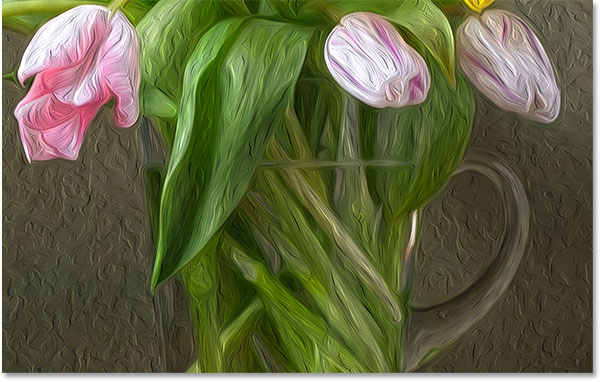
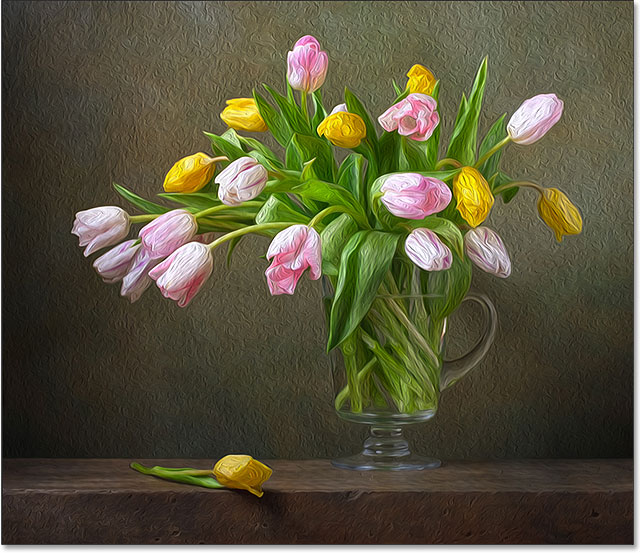
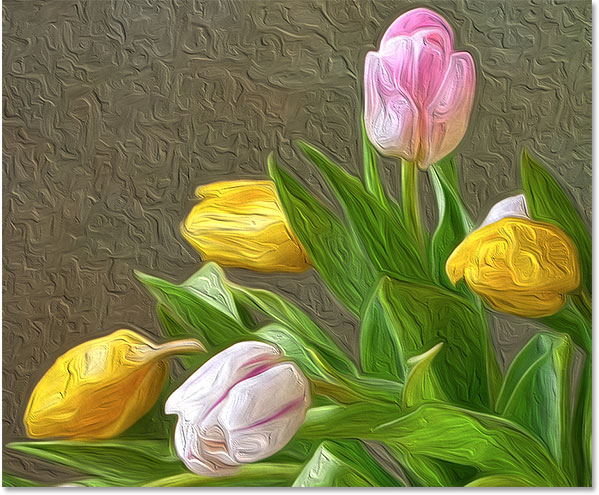
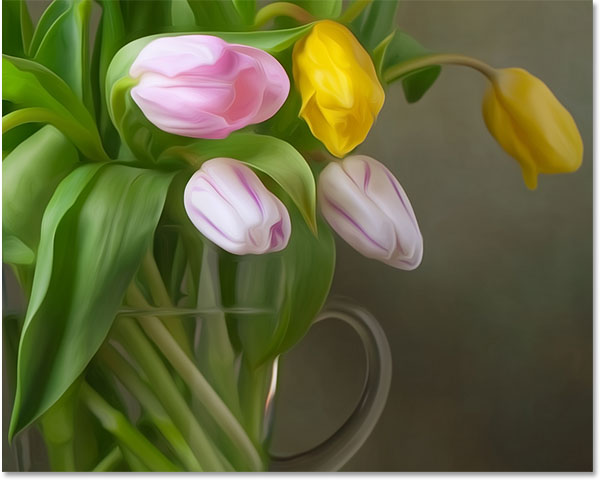
Here's the image I'll be using which I downloaded from Adobe Stock:
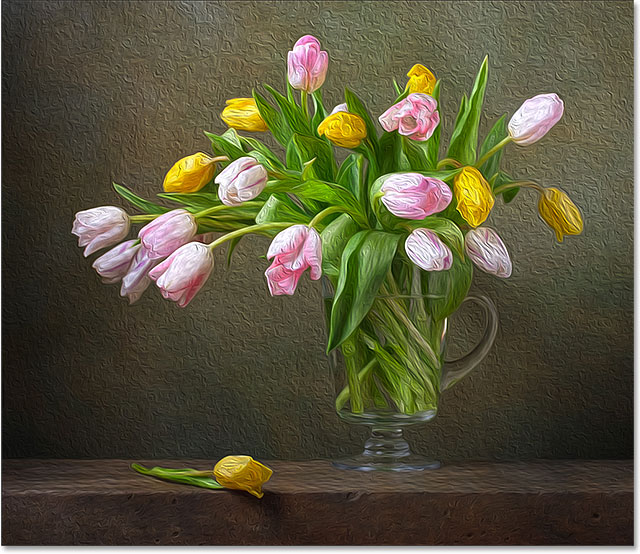
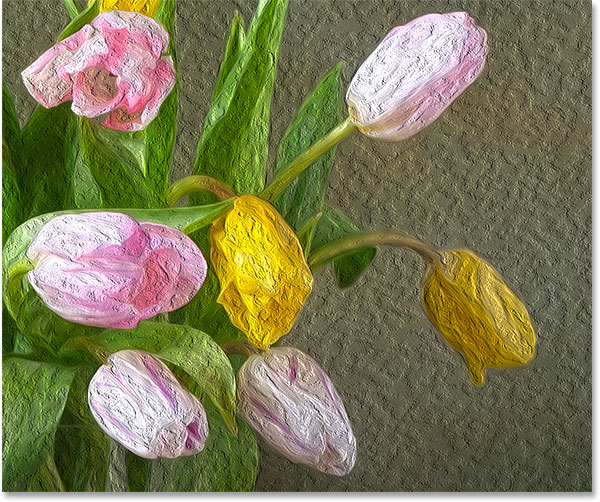
And here's how it will look after applying the Oil Paint filter:
How To Use The Oil Paint Filter
Step 1: Convert The Background Layer Into A Smart Object
There's two ways that we can apply the Oil Paint filter to our image. One is as a static filter, which means we'll be making permanent changes to the pixels in the image. The other is as a Smart Filter which keeps the filter settings non-destructive and fully editable. It's always best to work non-destructively in Photoshop, so let's apply the Oil Paint filter as a Smart Filter. That way, we'll be able to easily go back and try different settings until we get the effect looking just right.
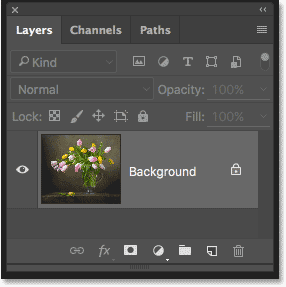
If we look in the Layers panel, we see our image sitting on the Background layer:
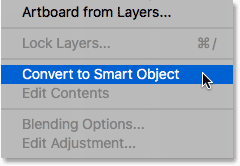
To apply the Oil Paint filter as a Smart Filter, we need to apply it not to a normal layer but to a Smart Object, which means we'll first need to convert our Background layer into a Smart Object. To do that, click on the small menu icon in the upper right corner of the Layers panel:
Then choose Convert to Smart Object from the menu that appears:
It won't look like anything has happened to the image, but if we look again in the Layers panel, we now see a small Smart Object icon in the lower right corner of the layer's preview thumbnail. This lets us know that the layer has successfully been converted into a Smart Object:
Step 2: Select The Oil Paint Filter
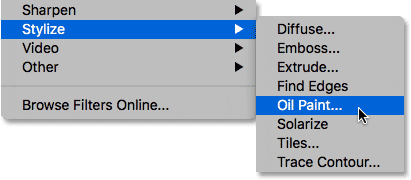
With our layer now converted to a Smart Object, we're ready to apply the Oil Paint filter. Go up to the Filter menu in the Menu Bar along the top of the screen, choose Stylize, and then choose Oil Paint:
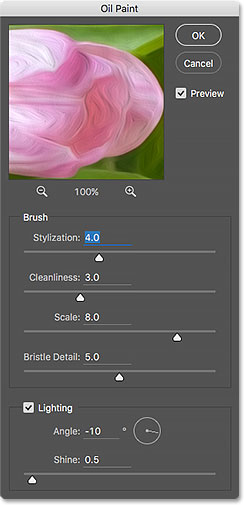
This opens the Oil Paint filter dialog box. In Photoshop CS6, the dialog box took up the entire screen, but now in the Photoshop CC version, it's much smaller and fits nicely with the rest of the interface. At the very top, we have a preview window, and below it are various options for controlling the oil painting effect, all of which we'll look at in a moment:
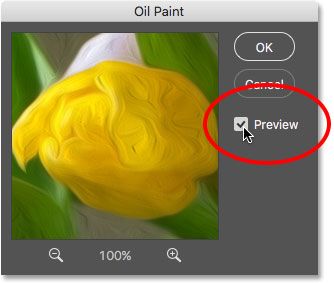
The Preview Window
Even though Photoshop gives us a live preview of the oil painting effect within the image itself, most images these days are too big to fit entirely on the screen at their actual size. This forces us to view them at something less than the 100% zoom level, which means we're not seeing all of the pixels in the image, and that means we're not seeing a truly accurate representation of what the image looks like.
Fortunately, the preview window at the top of the Oil Paint filter's dialog box gives us an easy way to view and inspect different areas of the image at that all-important 100% zoom level. Only a small section of the image can fit within the preview window, but you can easily jump to different areas just by clicking on the spot you want to inspect.
When you move your mouse cursor over the image, you'll see the cursor change into a little square which represents the boundaries of the preview window. Simply click on the spot you want to inspect. Here, I'm clicking on one of the yellow flowers:
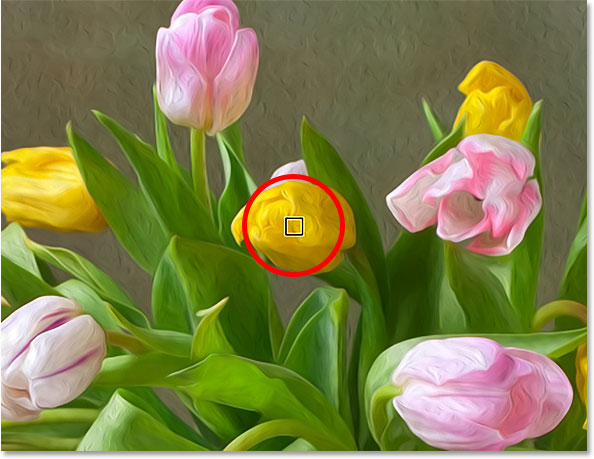
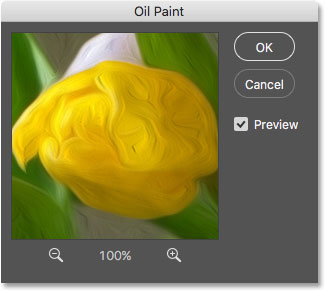
The spot you clicked on is what you'll see in the preview window:
If you look directly below the preview window, you'll see the current zoom level, set to 100% by default. You can use the plus and minus icons on either side of the zoom level to change it, but in general, you'll want to leave it at 100% for the most accurate view:
Finally, the Preview option to the right of the window controls whether or not we see a live preview of the oil painting effect within the image itself (as opposed to just inside the preview window in the dialog box). In most cases, you'll want to make sure it's selected (checked) so you're seeing the live image preview, but if, at any time, you want to see your original image again for comparison, simply uncheck the Preview option. You can quickly toggle the Preview option on and off by pressing the letter P on your keyboard:
The Brush Options
Now that we know how to preview the oil painting effect, let's learn how to actually create it. The options in the dialog box are divided into two main sections. First, we have the Brush options (Stylization, Cleanliness, Scale, and Bristle Detail) which we use to adjust various aspects of the brush strokes. Below the Brush options are the Lighting options (Angle and Shine) which control the direction of the light source as well as the overall contrast of the effect.
We'll start by looking at the Brush options. But before we do, for the purpose of this tutorial, make sure the Lighting option is turned on (checked). The reason is that without the lighting effects, we won't be able to see our brush strokes, which would make learning how the Brush options work a bit of a challenge. Also, with the Lighting options turned on, increase the Shine value (which controls the effect's contrast) so that you can clearly see the brush strokes in your image. You don't need to crank it too high. I'll set mine to around 2.0 for now. Again, this is just to make it easier for us to learn how the Brush options work. We'll come back to the Lighting options later:
Stylization
The first brush option is Stylization. It controls the style of the brush strokes, ranging from a daubed look at the lowest setting to a very smooth stroke at the highest setting. If you drag the Stylization slider all the way to the left, to its lowest value (0.1):
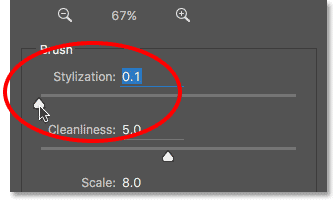
It will look like your image was painted by daubing the brush onto the canvas, giving it a rough and detailed appearance:
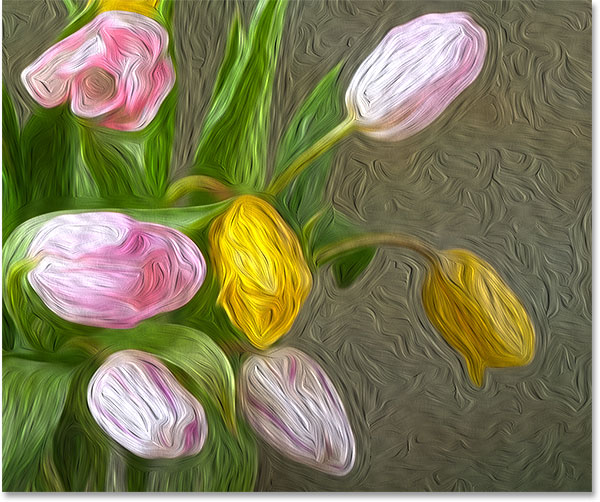
As you increase the Stylization value by dragging the slider towards the right, you'll begin to smooth out the brush strokes. And if you drag the slider all the way to the right to the maximum value of 10:
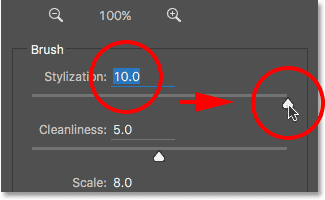
You'll create the smoothest strokes possible:
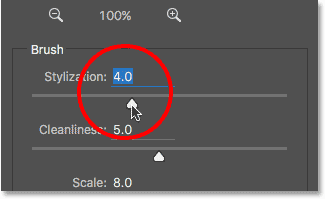
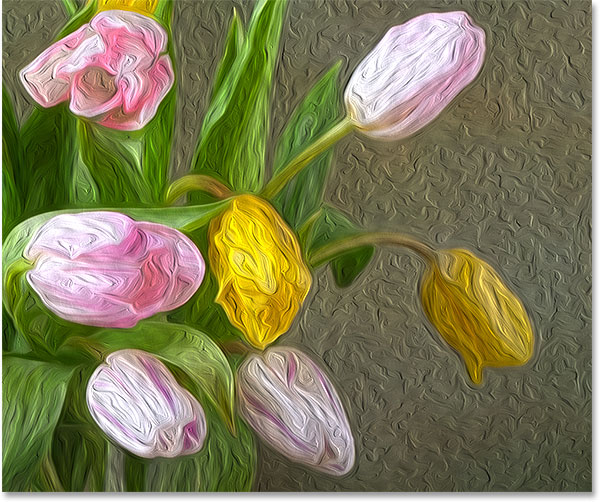
For my image, I think something in between works best. I'll go with a value of 4. You may find that a different value works better for your image, but don't worry about getting it perfect. You'll most likely want to come back and re-adjust things after setting the other options since they all work together to create the overall effect:
Here's what my brush strokes look like so far. At a more mid-range Stylization value, the strokes have a nice blend of smoothness and detail:
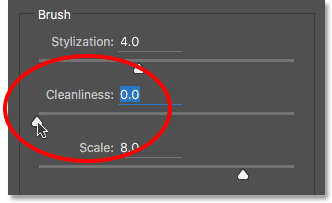
Cleanliness
The second brush option is Cleanliness. It controls the length of the brush strokes, ranging from short and choppy at the lowest setting to long and fluid at the highest. Short brush strokes give the painting more texture and detail, while long strokes give it a less detailed, cleaner look.
I'll drag my Cleanliness slider all the way to the left, to its lowest value (0):
This gives me the shortest possible brush strokes:

If I drag the Cleanliness slider all the way to the right to its maximum value of 10:

I get long, fluid strokes, resulting in a much cleaner, less detailed effect:
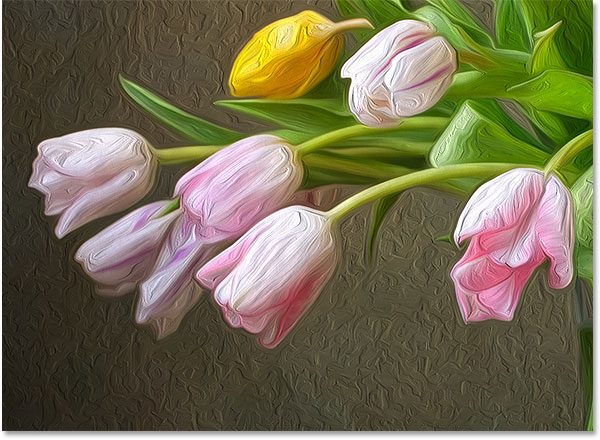
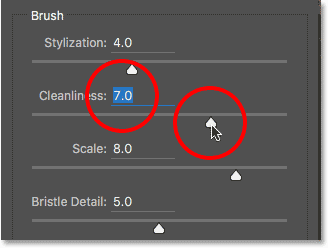
For this image, I think long, fluid strokes work better, but at the maximum Cleanliness value, they're too long. I'd like to bring back a bit more detail so I'll lower the value to around 7. Again, a different value may work better for your image:
Here's what the result looks like. It's important to keep in mind that all of the options in the Oil Paint filter's dialog box are working together to create the look we're seeing, so this result isn't simply what we get by, say, setting the Cleanliness value to 7. Cleanliness controls only one aspect of the painting (the length of the brush strokes), but it's all of the options combined that create the overall effect:

Scale
So far, we've learned that Stylization controls the smoothness of the brush strokes while Cleanliness controls their length. The third option, Scale, controls the size or thickness of the brush itself. Use low Scale values for thin, fine brushes or higher values for bigger, thicker brushes.
I'll lower my Scale value down to its minimum setting (0.1):
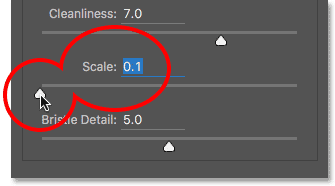
At the lowest setting, the strokes look like they were painted with a very thin, fine brush. Notice also that since thinner brushes tend to use less paint, we see a thin coast of paint on the canvas:

If I drag the slider to the opposite end, increasing Scale to its maximum value (10):

Now, the brush strokes are much thicker as if a bigger brush was used. And, since bigger brushes tend to use more paint, the higher Scale value creates what looks like thicker globs of paint on the canvas as opposed to the thin layer we saw previously:
I like the look of the larger brushes for this image so I'll keep my Scale value fairly high, lowering it from 10 down to 7:
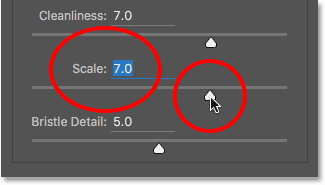
Here's the result:
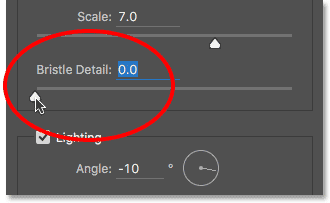
Bristle Detail
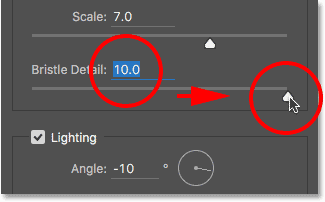
The fourth Brush option is Bristle Detail. It controls the strength of the grooves created in the paint by the hairs in the brush. At lower values, the grooves appear light and soft, becoming stronger and more pronounced as you increase the value.
I'll lower Bristle Detail down to its minimum setting (0):
To make it easier to see the effect, I'll zoom in to 200%. At the lowest setting, there's very little in the way of bristle detail:
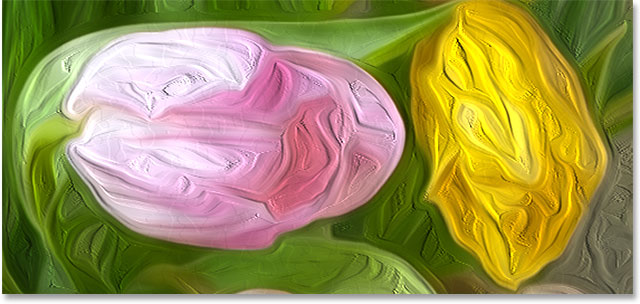
Yet if I increase the option to its maximum value of 10:
The grooves become much stronger and more obvious:
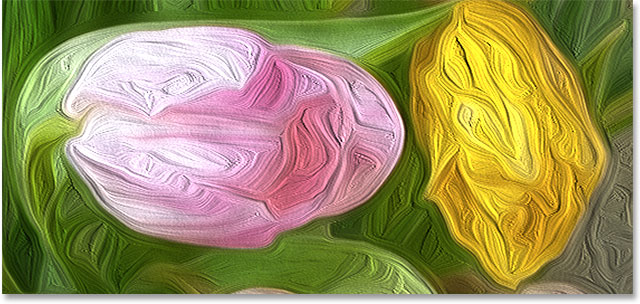
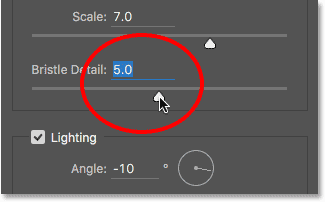
I'll split the difference and set my Bristle Detail value to 5:
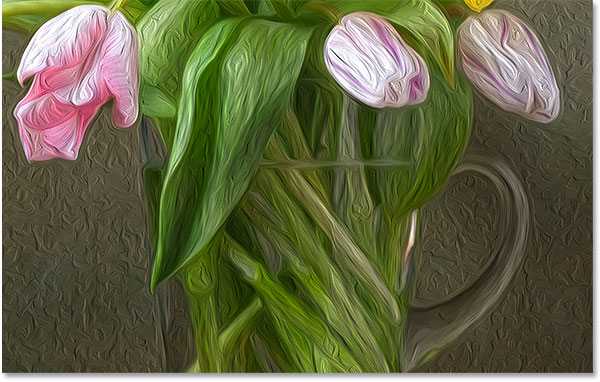
Here's what my oil painting effect looks like so far after setting all four Brush options:
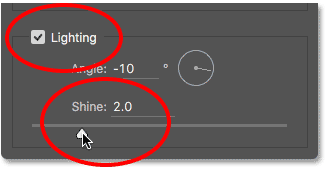
The Lighting Options
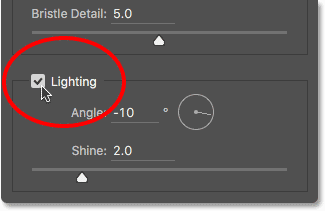
Below the Brush options are the Lighting options. Even though there's only two of them (Angle and Shine), they play a powerful role in how the overall effect appears. Before we can set the lighting options, we first need to enable them by making sure the checkbox to the left of the word "Lighting" is selected. We'll look at why you might want to turn the lighting off in a few moments:
Angle
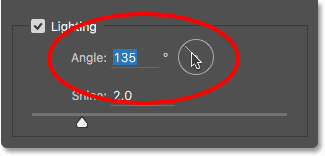
The first of the lighting options, Angle, controls the direction of the light source shining on the painting, which affects the direction of the shadows and highlights created by the paint. To change it, simply click and drag inside the circle to rotate the dial. In my case, the image itself has a light source that seems to be coming from the upper left, so I'll rotate the angle to match it as closely as I can. Something around 135° should work:
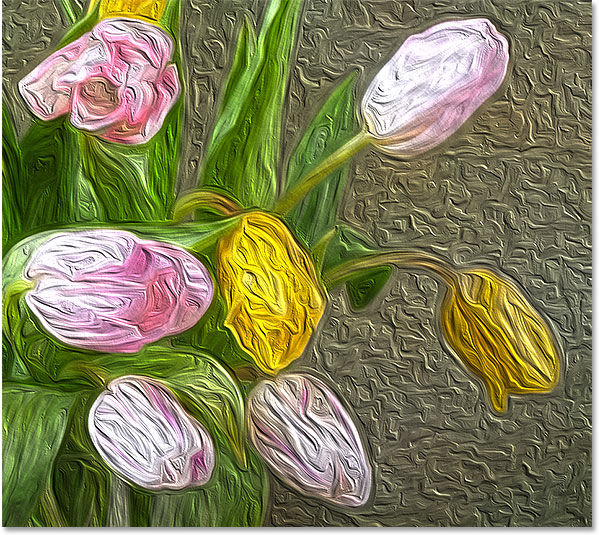
For comparison, here's how the painting initially looked before changing the lighting angle, back when the light was coming from the lower right. Keep an eye on the shadows and highlights:
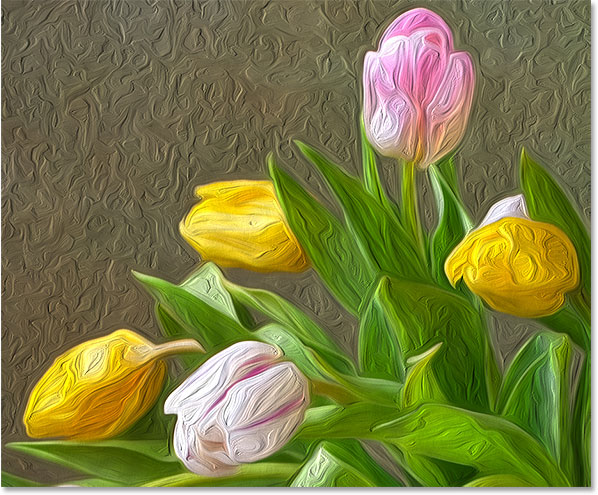
Here's how it looks after rotating the angle towards the upper left. Some areas, like the white and yellow flowers near the bottom, appear to have lost detail after the lighting change, while others (like the yellow flower near the center) now show greater detail:
Shine
Finally, the Shine option controls the intensity of the light source, which affects the intensity of the shadows and highlights (of the paint, not of the actual image). Setting Shine to its lowest value of 0 essentially turns the light source off, giving the effect a very flat look, while cranking it all the way to its maximum value of 10 usually creates shadows and highlights that are much too strong. In most cases, a fairly low Shine value works best.
If I set Shine to a very low value, something like 0.5:
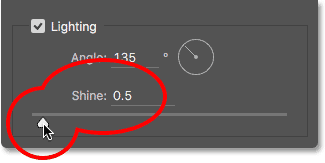
We see that the shadows and highlights in the paint appear very soft and subtle:

If I increase the Shine value to the halfway point (5):
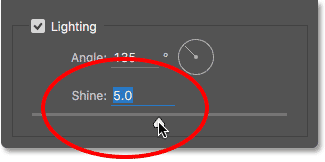
The intensity of the light source increases, creating much stronger highlights and shadows:
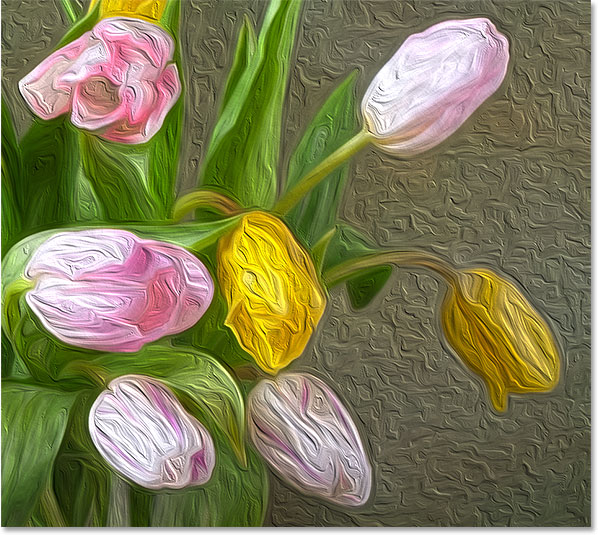
For this image, I'll set my Shine value to around 2.5 which adds a nice amount of detail without making things look too harsh:
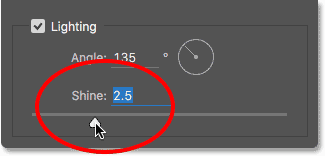
Here's the result:
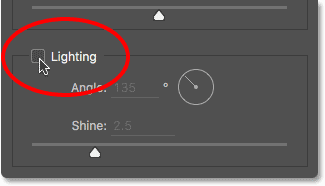
Turning Off The Lighting Options
Now that we've looked at the lighting options and how important they are to the overall appearance of the brush strokes, why would you ever want to turn the lighting off? Quite simply, you would turn it off when you don't want to see the brush strokes! Why would you not want to see the brush strokes? Well, with the brush strokes visible, we get an embossed effect created by the shadows and highlights, with the paint looking as if it's layered on top of the canvas. Turning the lighting off flattens the image, giving you a very clean, soft and smooth result.
To turn the lighting off, simply uncheck the main Lighting option. This does not hide the entire effect created by the Oil Paint filter. It only turns off the lighting:
As soon as you turn the lighting off, your image will appear very soft and smooth. For comparison, here's the effect with the lighting turned on:
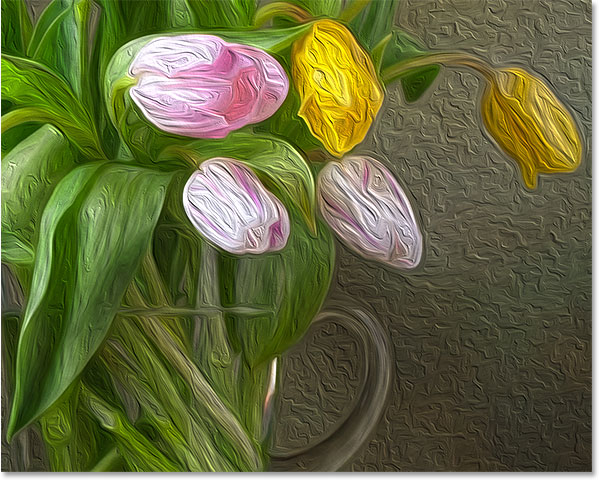
And here's what it looks like with the lighting turned off. It still looks like a painting because much of the detail from the original image has been smoothed over. Yet without the shadow and highlight detail from the brush strokes, we get a much cleaner looking effect. You may want to go back to your Brush options and change the Stylization and Cleanliness values if you've turned the lighting off to adjust the smoothness of the effect. In this case, I've increased my Stylization value from 4 to 6:
Applying The Oil Paint Filter
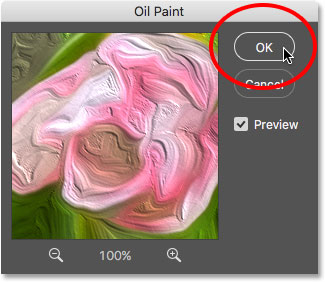
I'm going to turn my lighting options back on and set my Stylization value back to 4. When you're happy with how the oil painting effect looks, click OK in the upper right of the dialog box to close it and apply your settings:
Here's my final result:
Re-Editing The Oil Painting Smart Filter
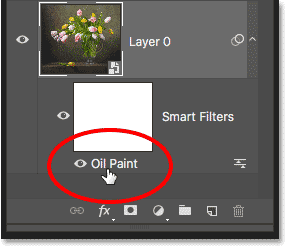
Back before we applied the Oil Paint filter, we first converted the Background layer into a Smart Object. This allowed us to apply the filter as a Smart Filter. If we look again in the Layers panel, we see the Oil Paint filter listed as a Smart Filter under the image.
The main benefit of Smart Filters is that they remain fully editable. If you need to make further changes to any of the filter's settings, simply double-click directly on the name "Oil Paint". Photoshop will re-open the Oil Paint filter's dialog box where you can make any changes you need:
And there we have it! That's how to use the Brush and Lighting options in the Oil Paint filter to easily turn any photo into an oil painting with Photoshop CC! Check out our Photo Effects section for more Photoshop effects tutorials! And don't forget, all of our Photoshop tutorials are ready for download as PDFs!